A Complete Guide to the Handin Server (Faculty)
1 An overview of the server
Bottlenose aims to be a functional, convenient tool to help professors manage the grading of their courses, and so provides support for many of the artifacts you will likely encounter each semester. It is not intended to be a content management system, so it will not help you manage your course website. Nor will it help if your course relies on providing some customized system environment for students to log into and develop programs in. It provides a centralized place for students to submit assignments, for graders to give feedback on those assignments, and for professors to record homework and exam grades for easy extraction at the end of the semester. Here is a glossary of the key concepts in the Bottlenose system:
Course: The primary unit of control in the handin server. A course can have several sections, many students and staff members, many assignments, etc. Every course has a title and is associated with a term. Only professors may create courses.
Term: An individual semester. Each term can have several courses.
- Registration: An association between an individual user and a course. A registration is associated with a role:
Files assignments are typical, and ask students to submit something they’ve written (code, prose, whatever). Grading of files assignments is discussed below.
Questions assignments are online quizzes, completed and graded entirely within the browser.
Code reviews are conceptually “Questions assignments about a Files assignment”: they ask students to answer questions about code written for another assignment. Code reviews can either be self-reviews or peer-reviews, to allow students to reflect on either their own code or on their classmates’ code (anonymously). Once code reviews are completed and graded, students can see the reviews of their code by looking back at their underlying code submissions; the code reviews will appear adjacent to the grades they’ve received. Students can be asked to complete more than one code review; this implies students will receive more than one review on their code. The grade a student receives on their Files submission is not affected by the reviews they receive from their peers.
Exams are offline exams, whose grades are recorded online for completeness and to make grade computation easier at the end of the semester.
Submission: an individual response by a student to an assignment. Students may submit to an assignment many times, if desired. By default the most recent submission is the one used for grading, however professors have the ability to select earlier submissions instead (to account for extenuating circumstances).
Graders: In the context of a Files assignment, there can be many components to the final grade: style checking, automated unit tests, manual feedback from the course staff, etc. Each component is configured by a Grader.
(Unfortunately the term “grader” is overloaded to also refer to registration role of course staff who are allowed to grade homeworks.)
Grades: In the context of a submission to a Files assignment, each grader produces one grade. The sum of these grades (minus any lateness penalties) is the overall grade for the submission.
Grader allocation: An assignment of a homework submission to be graded to a staff member to grade it. Grader allocations are tracked so professors can see on average how long each staff member takes to complete their assigned work.
Team: Assignments might reasonably be worked in groups rather than individually. A team comprises a group of students, as well as a start and end date for when the team is in effect. If a team is dissolved (has an end date) prior to an assignment’s due date, then any submissions by that team are considered inactive. Consider the scenario where Alice and Bob are teammates, and submit a homework together. Their team dissolves before the assignment deadline, and Bob and Carl form a new team and submit to that assignment again. At this point, Alice is considered not to have any active submissions, since her most recent submission was not completed with a current partner. A professor can choose to mark Alice’s submission as active anyway, as the situation warrants.
Teamset: Courses that use team assignments might reasonably want to switch teams several times during the term. This creates a logistical challenge: students need to create teams for the next assignment while the current assignment is still in progress. However, it only makes sense for students to be in a single active team at a time —
at least for any individual assignment. Accordingly, assignments are associated with teamsets, and each teamset is associated with many teams. This indirection allows students to be in several active teams simultaneously, but still only have one active team per assignment. Interlock: Code review assignments contain questions describing details of the underlying Files assignment, and if a code review is assigned immediately after the underlying assignment, it’s possible for an unscrupulous student to look at the questions in the code review, revise their underlying assignment, take a late penalty and resubmit that assignment, and then submit the code review. Interlocks prevent this sequence of events.
Impersonate: In extenuating circumstances, a student might have trouble submitting a homework, or may have dropped the class without informing the professor. A professor can submit on the student’s behalf, or can withdraw the student, by impersonating the student on the server. This lets the professor take actions as the student, but with extra abilities because they are the professor.
2 Logging in
Go to https://handins.ccs.neu.edu/ on your web browser. Please note that you cannot use Microsoft Edge or Safari as they are not currently compatible with the handin server. You should see this page:
Log in using your CCIS credentials. The first time you log in you should see this page:
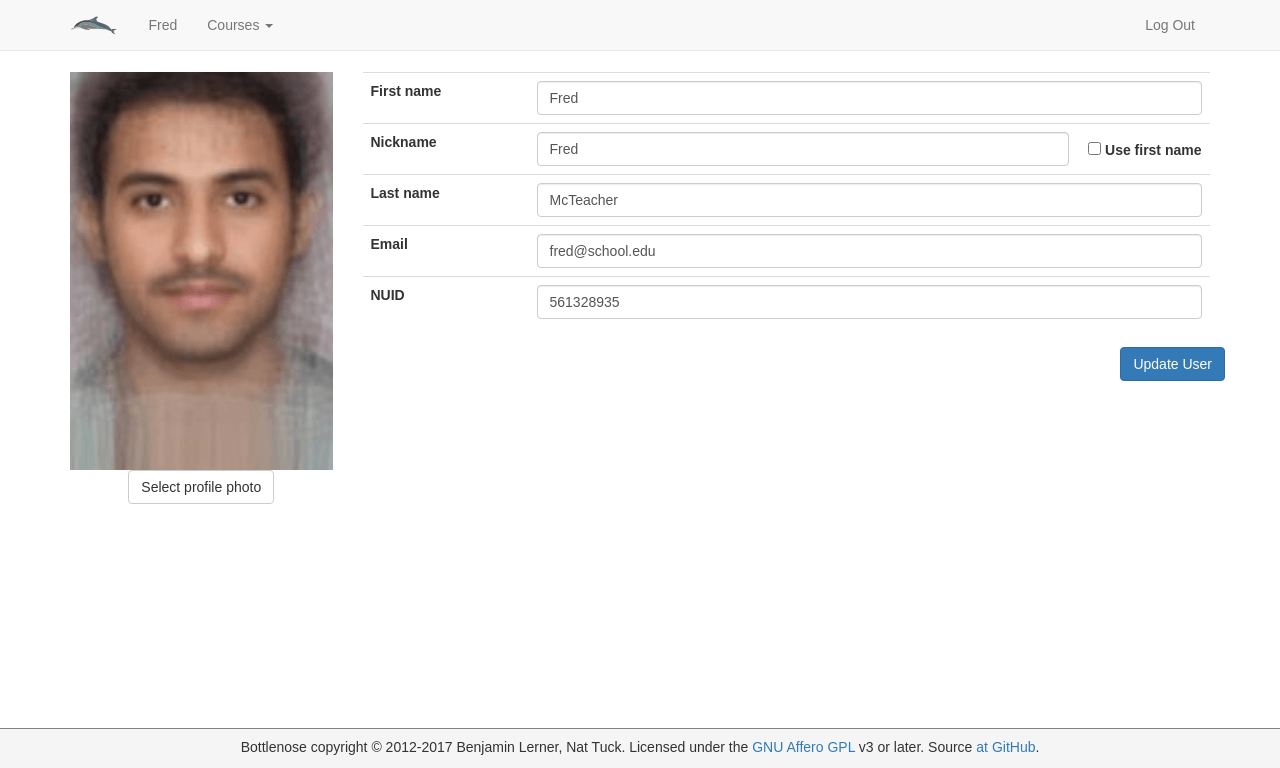
Please provide your first name, your preferred name, your Last name, an email address, your NUID#, and a profile picture. It is very important to provide a recognizable profile picture so we know who you are. Please note that if your profile photo looks odd it is because it has been resized. To fix this please upload a smaller file (less than 200px wide by 300px tall, and less than 50KB in file-size). Click the
 button in the lower right corner of the screen when you are finished. This will take you to the list of courses.
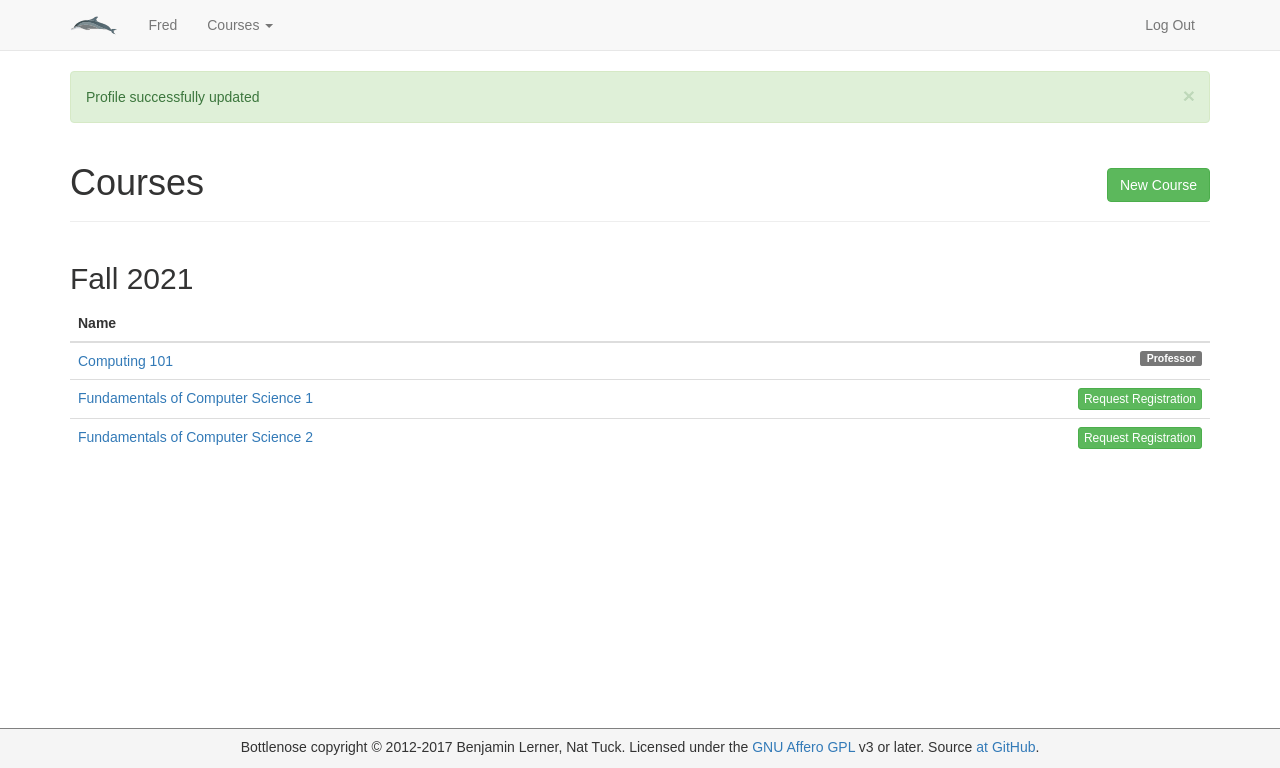
3 Managing Courses
3.1 Creating a course
If you are co-teaching a course with another professor, and that colleage has already created a course, you do not need to create another course yourself —
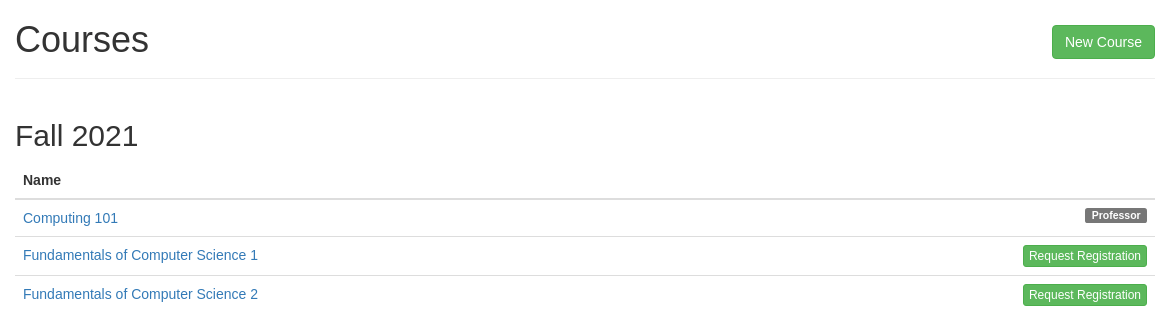
Click on the Courses link in the toolbar. I have starred the link in the image below which also shows what the Courses page looks like.

In the resulting page, click on the
 button in the upper right.
Enter the name of the course and select the semester in which the course should appear. We recommend a format of “CS#### - Course Name”. If the same course is offered at multiple campuses, then indicate the campus as “CS#### (City) - Course Name”.

For each lecture, lab, recitation, or online section, you will need to enter the CRN, the CCIS username of the professor, the time and place where the class is held, and the type of section (e.g. “Lecture” or “Lab”). We recommend a format of “MTWRF Time (Building and room)”. If the server does not recognize a CCIS username please ensure that the professor has signed in to the handin server at least once before trying again. Please note that this information can be edited after the course has been created so if you make a mistake you will be able to fix it. However, please do not delete a section once you’ve allowed students to register for it!

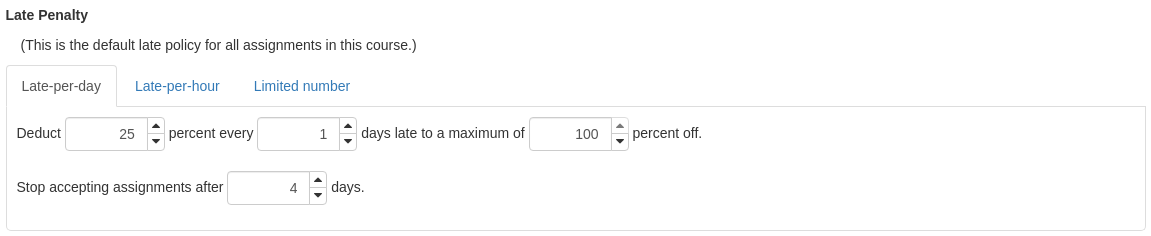
- Enter a default lateness penalty for your course. You can always change the lateness penalty on assignments to be different from the default. There are three kinds of lateness penalties:
A late-per-day penalty in which students have some percentage of their grade deducted every day they are late. Please note that 1 second after the deadline the submission is considered one full day late.
A late-per-hour penalty in which students have some percentage of their grade deducted every hour they are late. Again, 1 second after the deadline is one full hour late.
A limited number penalty in which students are given a fixed number of late days for use throughout the semester. No penalty is accrued for lateness, but once late days are exhausted, students cannot submit late at all. Note that for team submissions, all team members must have late days remaining in order for the team to submit late.
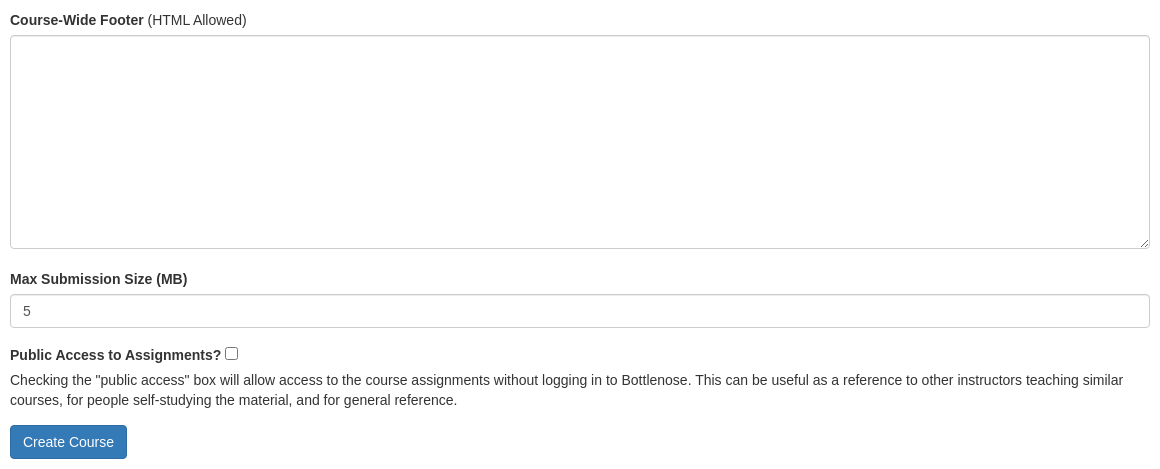
You can also enter a course-wide footer which will appear at the bottom of the pages for your course, and configure a maximum submission size (in MB, up to a site-wide limit of 10MB). When you are done click the blue
 button at the bottom of the page and your course will be created.
3.2 The homepage and the course homepage
To go to the homepage click the dolphin at the top of the screen (available from any page):

The homepage looks something like the image below. It is intended to be a useful-to-students summary, so it shows you a list of the courses you are registered for in each semester, and for each course shows the list of assignments and your team memberships.
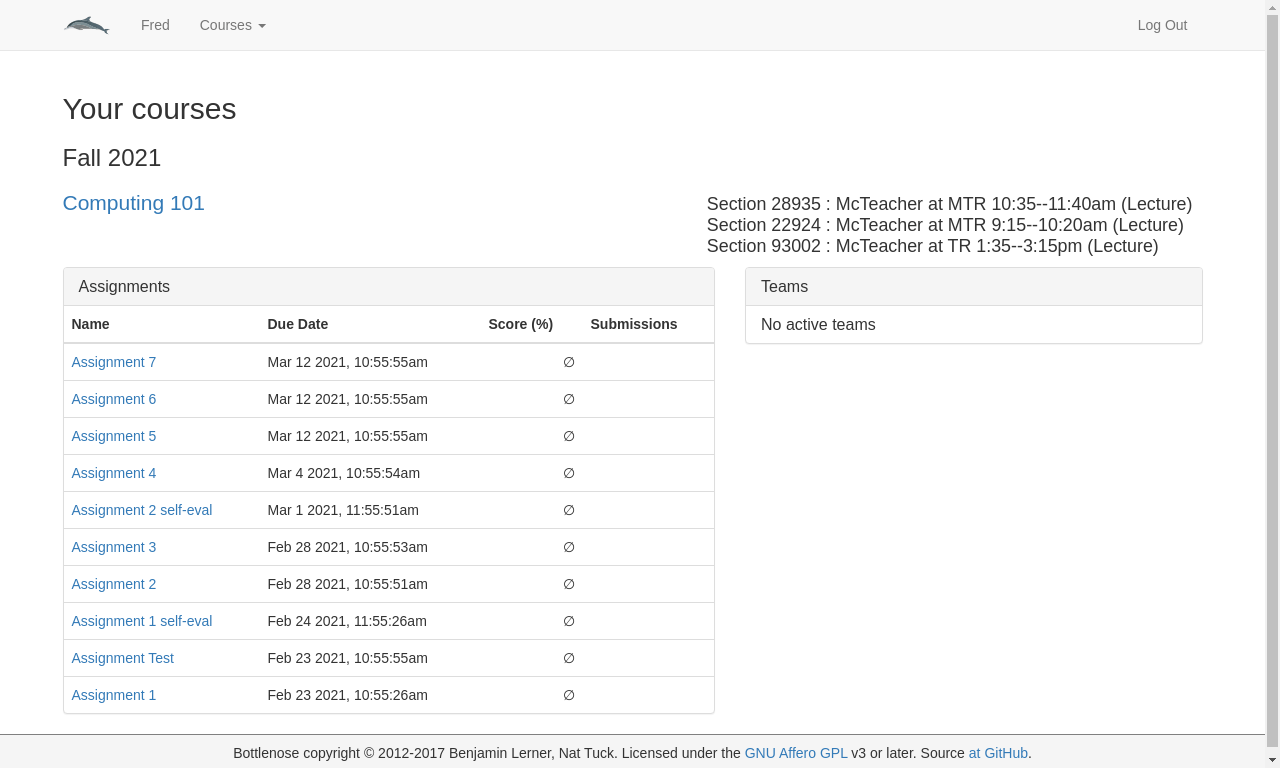
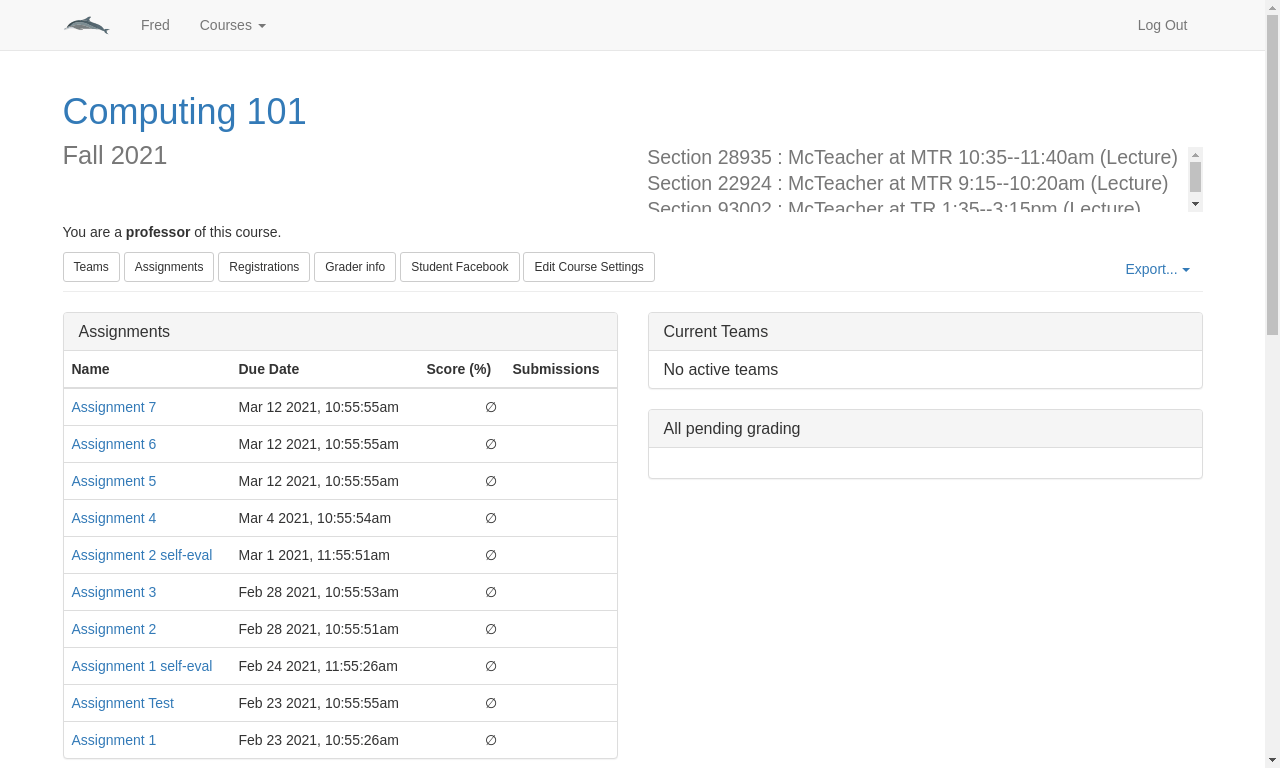
Clicking on any course title will take you to the main page for that course.
TODO: Finish this...
3.3 Downloading course grades
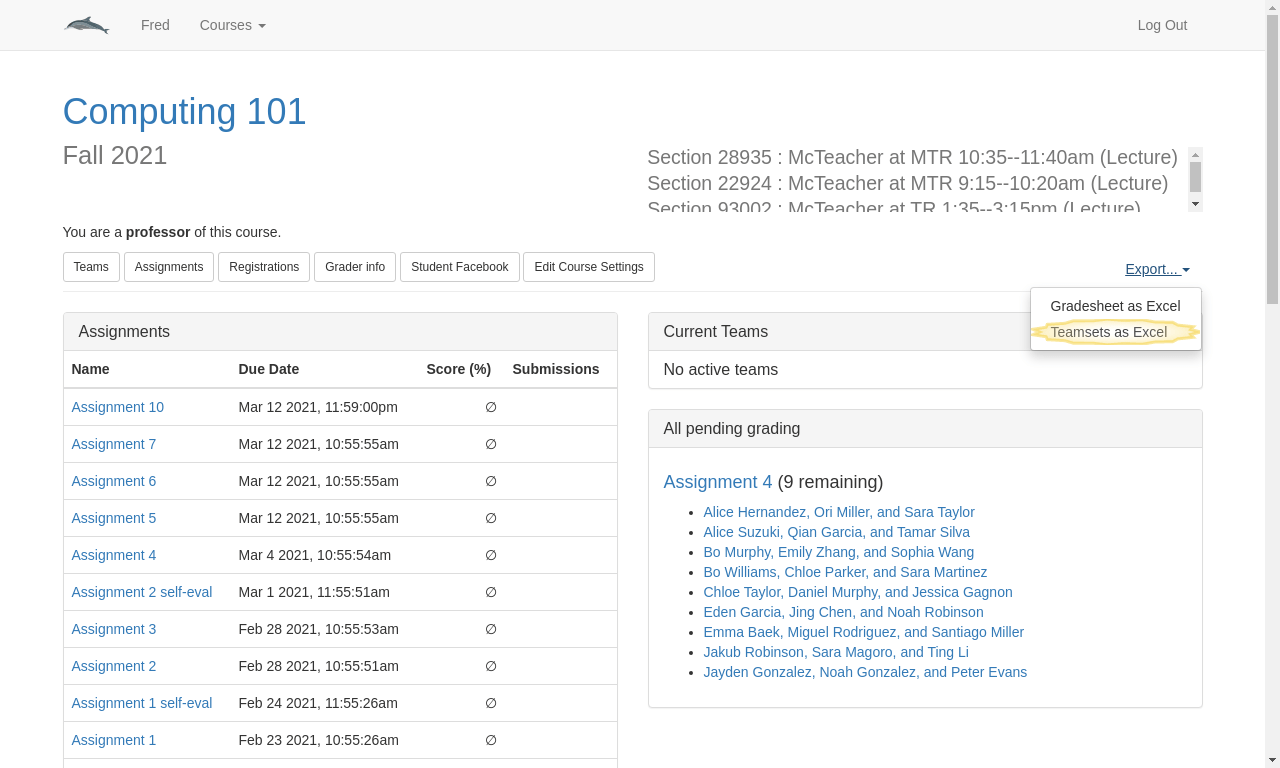
Click the “Export” link in the top right (this should be available on any page for the course) and select the “Gradesheet as Excel” option. This produces a spreadsheet containing: (1) a grade summary sheet, (2) a detailed homework grade-breakdown sheet, and (3) a detailed exam grade-breakdown sheet. The summary sheet contains live formulas to make it easy to adjust assignment weights, curve grades as needed, etc. Additionally, it will include information about which sections each student is registered for, and whether (and when) students dropped the course.

4 Managing assignments
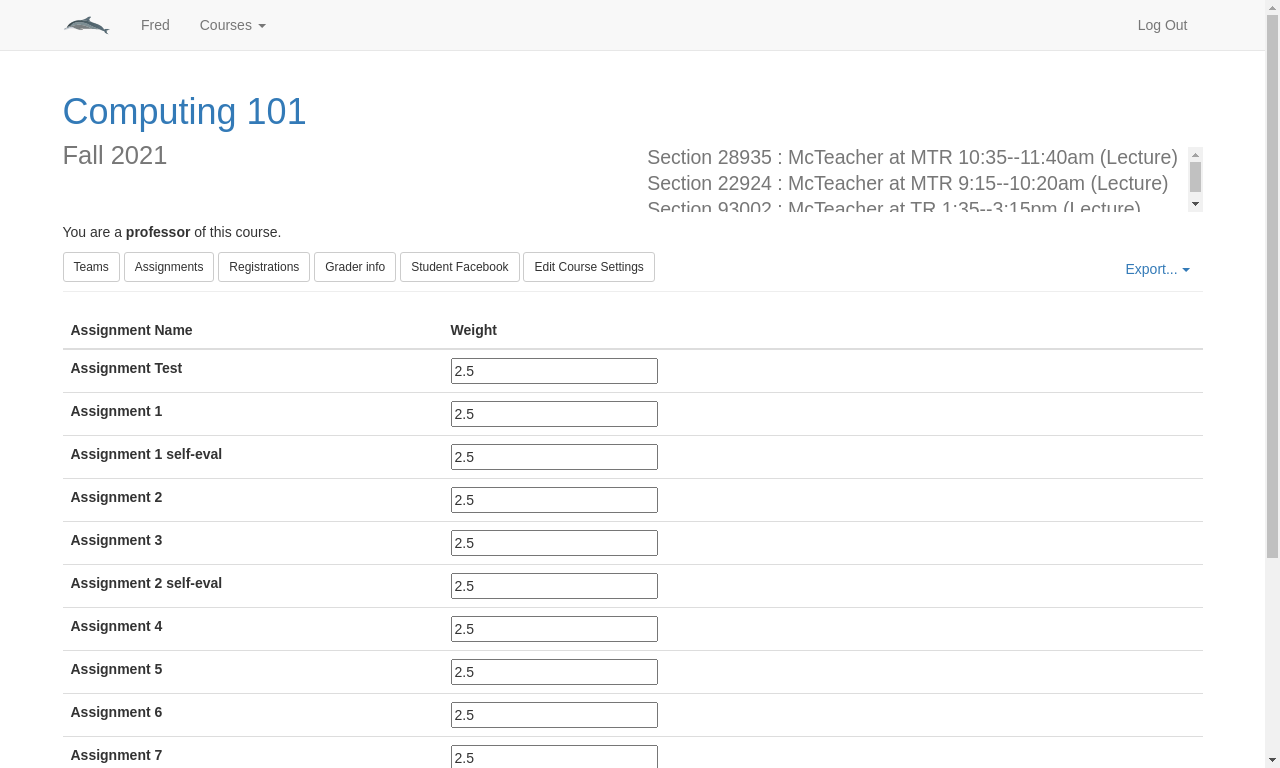
4.1 The assignments overview page
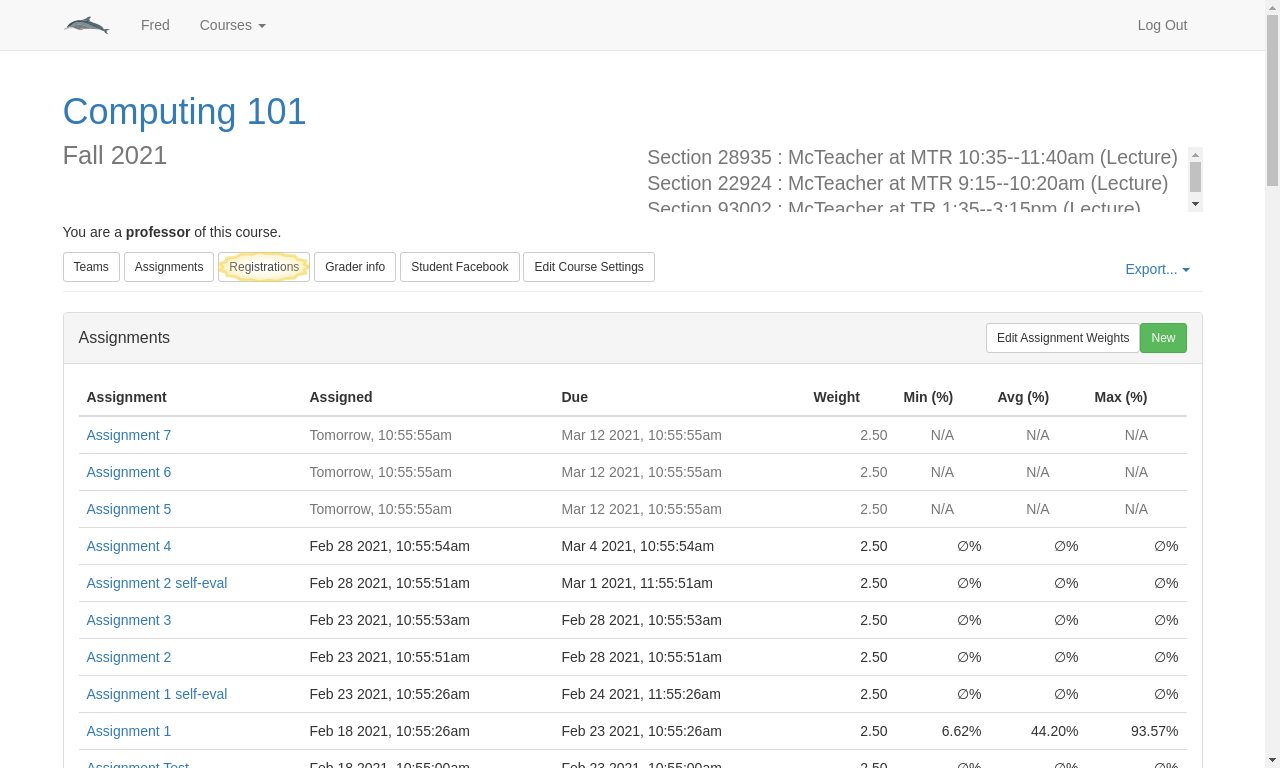
The assignments overview page gives you an informative summary of the grades in
your course so far. You can reach this page by clicking the
 button in the toolbar at the top of the page. This
page contains two tables: a summary of your assignments’ grades and a summary of
your students’ grades.
button in the toolbar at the top of the page. This
page contains two tables: a summary of your assignments’ grades and a summary of
your students’ grades.
TODO: image of assignments table
The assignments summary shows all the assignments for the course (so far), their assigned and due dates, their weights for the overall course grade, and the class-wide minimum, average and maximum grades, if available.
 button allows you to toggle visibility of any students that may have dropped
the course.) There are six grade statistics shown:
button allows you to toggle visibility of any students that may have dropped
the course.) There are six grade statistics shown:
The minimum possible grade: if students stopped submitting homeworks, and got zero points on any as-yet-ungraded homeworks, this would be their final grade.
The current grade: their current earned points divided by the maximum possible score of the currently graded homeworks. If students continue to do as well as they’ve been doing so far, this is their estimated grade. Note that this grade fluctuates wildly at the beginning of the semester, and can be misleading —
especially if there are some points allocated in the grading rubric that are not based on assignments, such as class-participation points, and for which prior homework performance is not necessarily predictive. The maximum possible grade: if students earned 100% on all future assignments, this is the maximum possible score they could receive, barring any unforseen extra credit. If this score ever drops below the passing threshold, students can conclude they will not pass the course. This score equals their minimum grade, plus any points in the next three categories.
"No submissions": The total score on homeworks that are available, not yet due, and which students have not submitted to yet.
"Ungraded": Homeworks that have been submitted, but are not yet graded.
"Future": Points that have not yet been allocated to homeworks at all.
The "@" symbol before the students’ names is a link to their email address.
Clicking on the row of a student will expand the row to show a trendline, comparing the student’s assignment scores to the class average score. This allows you to visually see if a struggling student is really lagging behind the class, or just had one really bad assignment. Dashed line segments surround assignments that the student did not submit.
4.2 Editing assignment weights
From the assignments page, click the  button.
The bottom two rows of that page will show the current grade total, and the remaining points (out of 100) that have not been allocated yet. If the remaining points is negative, that last line will turn red to warn you of overshooting 100.
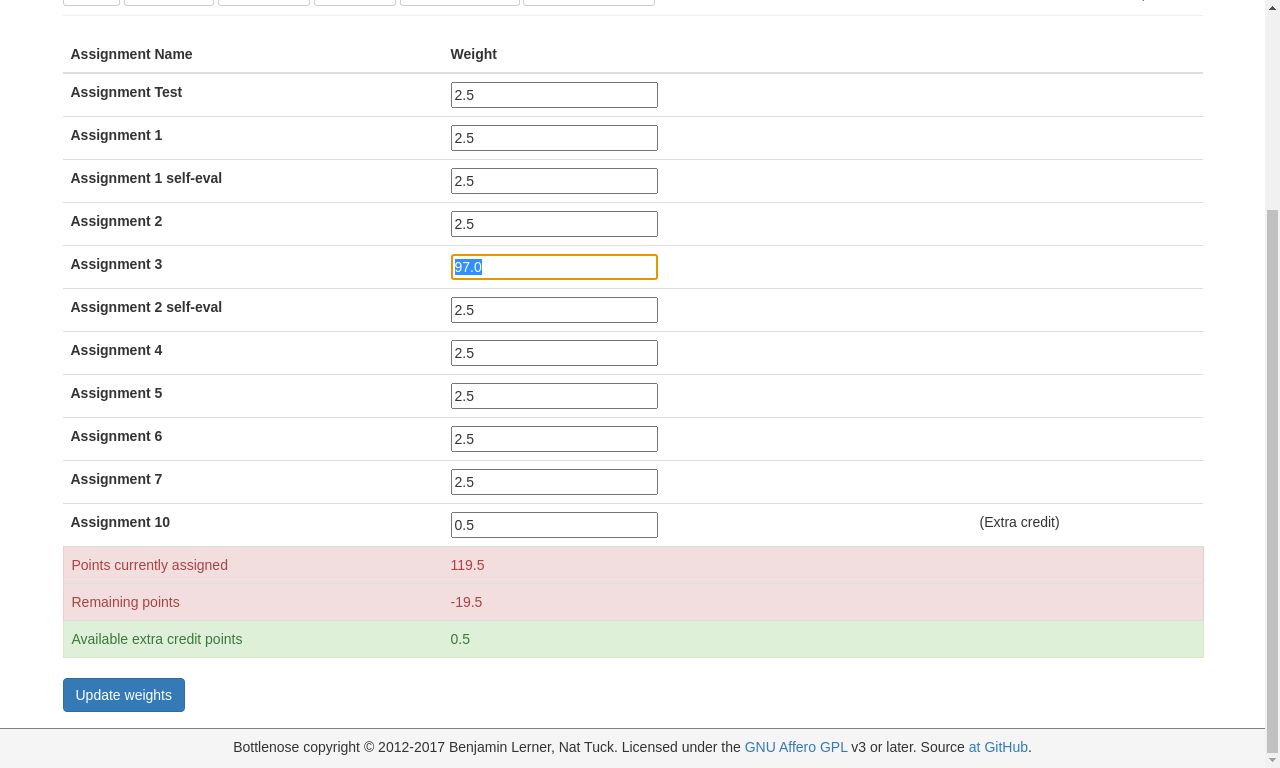
Revise the grades on that page, and click  to change all
the assignments’ weights.
to change all
the assignments’ weights.
4.3 Creating assignments
Go to the Assignments page by clicking the
 button in the top navigation
bar for your course.
button in the top navigation
bar for your course.Click the
 button on the right to create a new assignment.
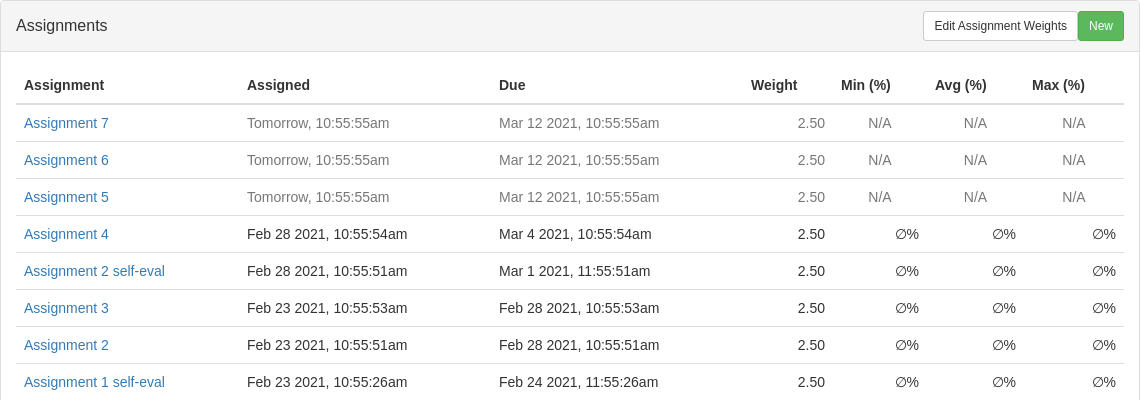
Select from the tabs which type of assignment you would like to create. There are four types: files, questions, code review, and exam. A files assignment should be created whenever you want students to submit a file for the assignment. A questions assignment asks students to answer several questions (this is good for an online quiz). A code review asks students to review code from a previous assignment. The exam assignment can be used for an exam or for inputting grades for any other on-paper assignment. Instructions for each type of assignment are given below.
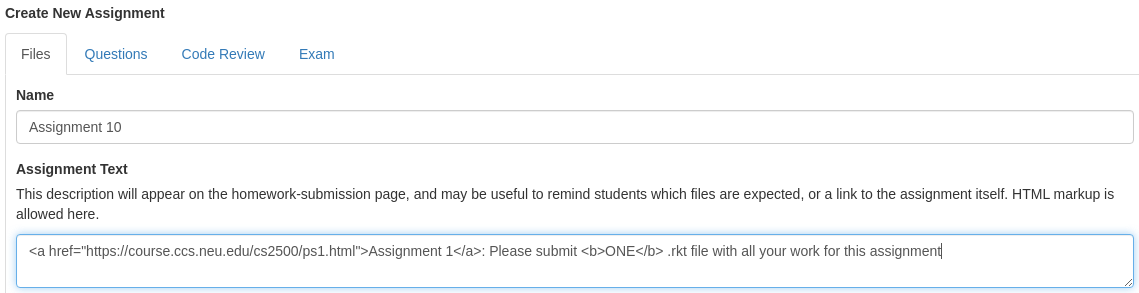
4.3.1 Creating Files assignments
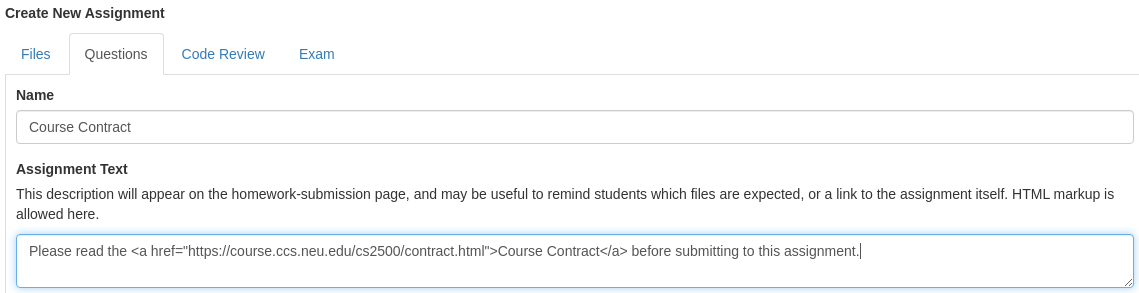
Enter the name of the assignment in the “Name” field. You can also provide a description of the assignment in the “Assignment Text” field but this is not required. Your description can include HTML as shown below.
If you are providing the students with some starter code, click the
 button to
select your starter file. Once you have selected a file you
should see the name of the file next to the browse button, as well as a
button to
select your starter file. Once you have selected a file you
should see the name of the file next to the browse button, as well as a
 . You can click “Browse” again to
change the file or “Clear assignment file” to remove the file altogether.
. You can click “Browse” again to
change the file or “Clear assignment file” to remove the file altogether.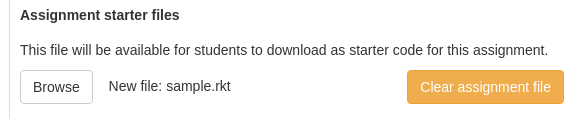
Enter the points available for this assignment in the “Points available” text box. This number is the percentage of the students’ grade that will be determined by this assignment. By default the points available will be the same as it was the last time you created an assignment (of any type). If this is the first assignment for the course it will be blank by default, but you must fill out this field to create the assignment. If you don’t want the assignment to be worth anything you should enter a zero in this field.
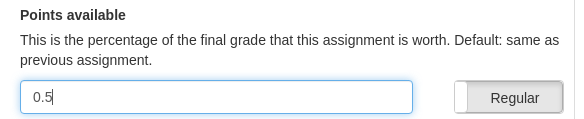
If this is an extra credit assignment you should click the toggle button that says
 to flip the switch. It should then display
as
to flip the switch. It should then display
as  . Extra credit assignments will display with a
 icon next to their
weight in the Assignments overview page.
icon next to their
weight in the Assignments overview page.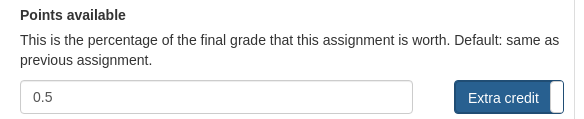
Enter the date the assignment is due in the “Due date” field and the date you would like students to be able to see the assignment in the “Available date” field.

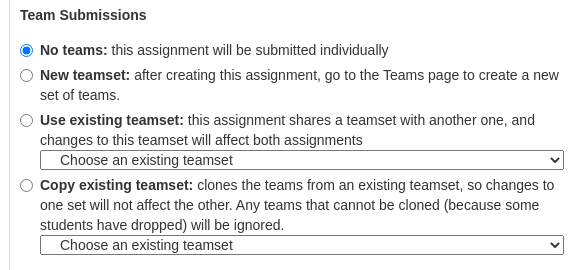
If this is an individual assignment select the “No teams” option. Otherwise you will have to choose which teamset to use for the assignment. You can create a new teamset with no teams, use an existing teamset, or copy an existing teamset.
If you would like to ask students how long it took them to complete this assignment click the switch that says
 under the
“Request time taken?” section. It should then display
under the
“Request time taken?” section. It should then display  to indicate
that the assignment will ask students to input the time it took them when they
submit. We do not currently expose a way to aggregate this survey information,
but we intend to.
to indicate
that the assignment will ask students to input the time it took them when they
submit. We do not currently expose a way to aggregate this survey information,
but we intend to.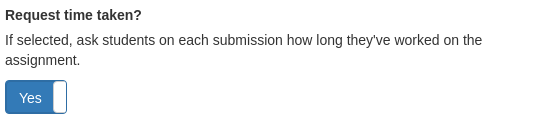
You may have a logical dependency between this assignment and another assignment. To enforce such a dependency, click the
 button.
 We support two kinds of interlocks:
Preventing submission to this assignment, until another assignment has been completed. This may be useful, for example, to ensure that students cannot submit their first homework until they’ve acknowledged the course contract.
Prohibiting submission to this assignment after viewing another assignment. This is useful to ensure that students cannot use a self-eval code review to improve their code submission.
You can change the late penalty to something other than the course default using the “Late penalty” section. The controls here are identical to those in defining the course-default lateness penalty.

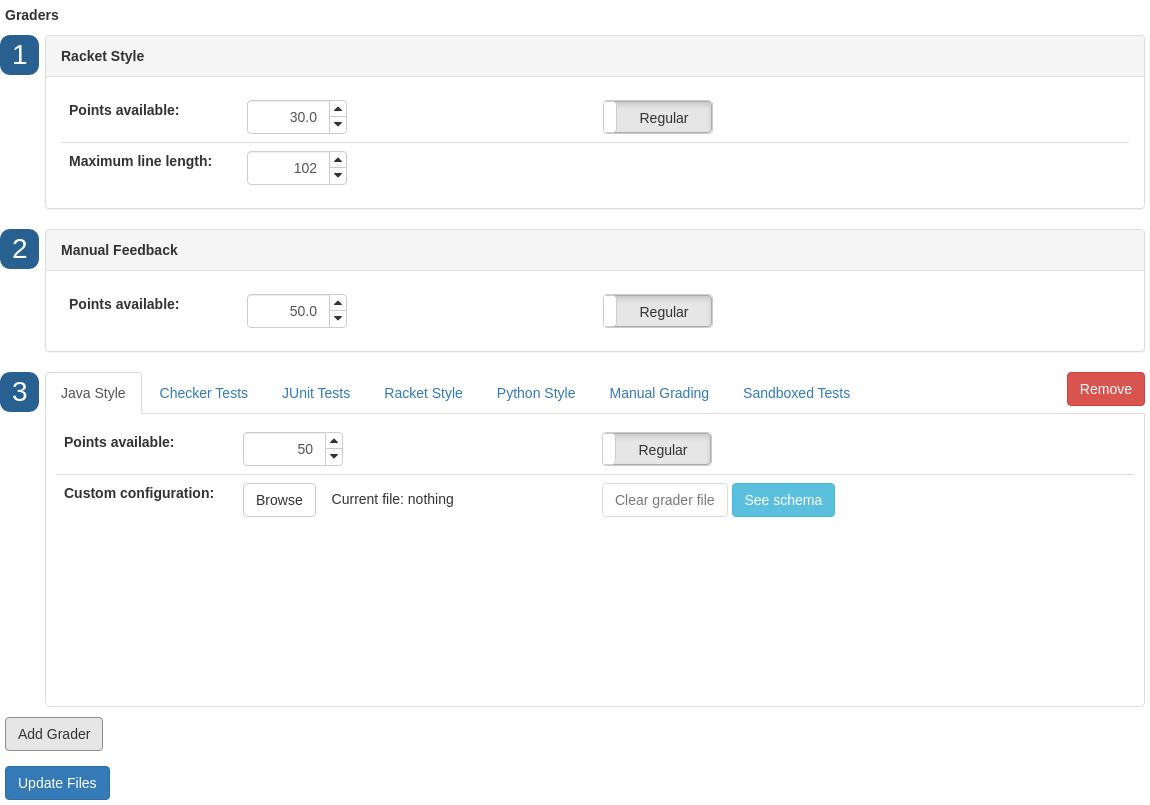
Ever assignment needs at least one grader. Bottlenose currently supports seven kinds of graders; we show the details of configuring them below. Click the
 button to add a new grader. Most assignments should have at least a style
grader of the appropriate type (Java, Racket, or Python) and a manual grader. A
manual grader allows your staff to see the files and leave feedback on them.
button to add a new grader. Most assignments should have at least a style
grader of the appropriate type (Java, Racket, or Python) and a manual grader. A
manual grader allows your staff to see the files and leave feedback on them.

If you create multiple graders, you may have a preferred order in mind to display them. Click and drag the blue numbers (
 ,
,
 , etc) to reorder the graders.
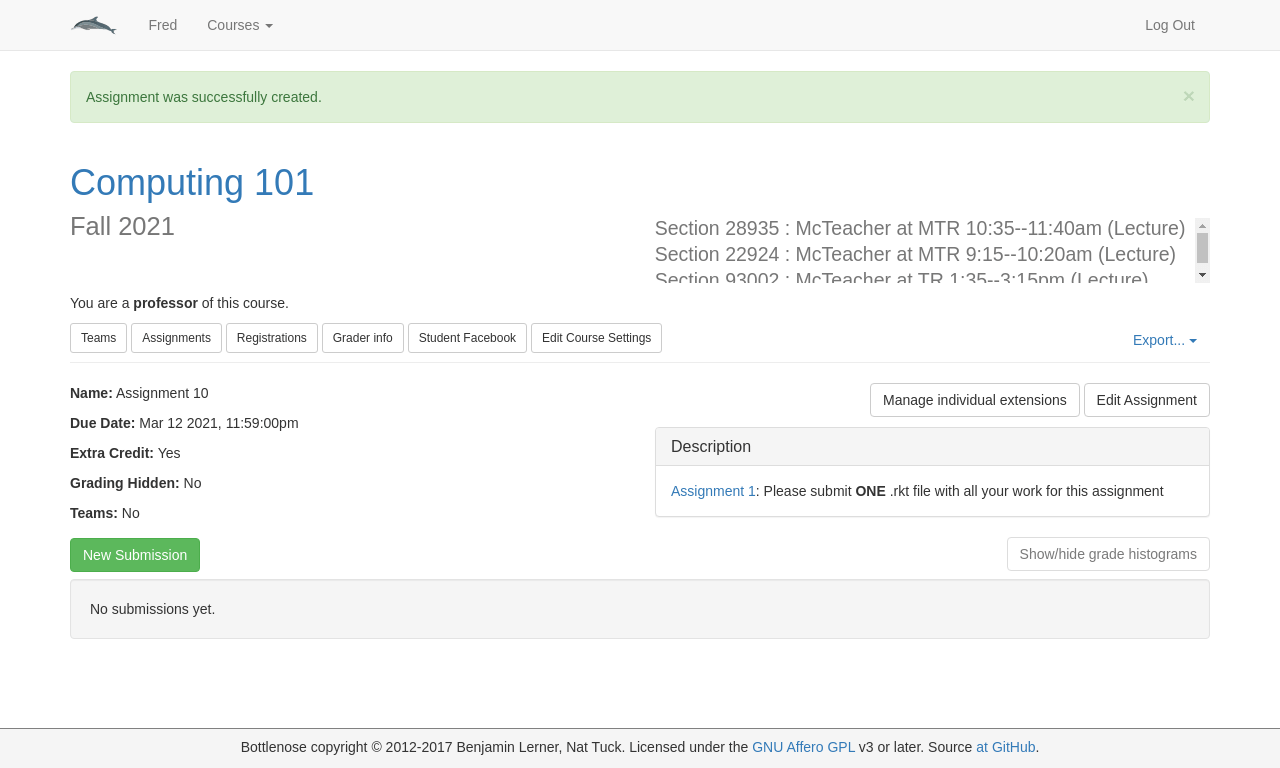
Once you have finished creating all the graders needed for your assignment, click the
 button to create
this assignment. You will be brought to the page for your newly created
assignment. You should see a green banner at the top that says “Assignment was
successfully created.”
button to create
this assignment. You will be brought to the page for your newly created
assignment. You should see a green banner at the top that says “Assignment was
successfully created.”
If anything goes wrong, you will see a red alert message at the top of the page. Usually, this means you’ve forgotten some required field, and the message will indicate what’s missing. Note that if you get an error, and you had selected an assignment starter file, you will need to reselect that starter file, as the browser cannot preserve that state across page loads.
4.3.2 Creating Questions assignments
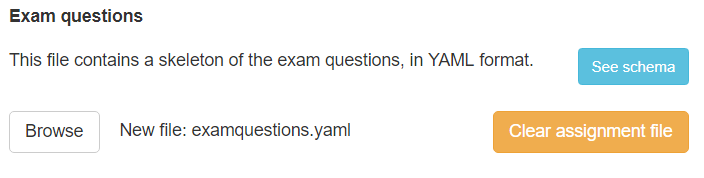
Enter the name of the assignment in the “Name” field. You can also provide a description of the assignment in the “Assignment Text” field but this is not required. Your description can include HTML as shown below.
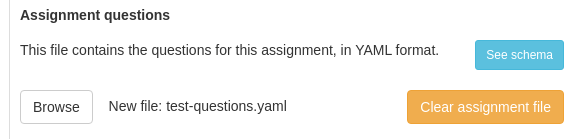
Click the
 button and select the YAML file that
contains the questions you would like to ask the students. If you are unsure
how to format your YAML file you can use the
button and select the YAML file that
contains the questions you would like to ask the students. If you are unsure
how to format your YAML file you can use the  button
to see an example file. (Note that for Questions assignments, codeTag
and codeTags answer types are prohibited, because there is no underlying
Files assignment with code to tag.) Once you have selected a file you should
see the name of the file next to the
button
to see an example file. (Note that for Questions assignments, codeTag
and codeTags answer types are prohibited, because there is no underlying
Files assignment with code to tag.) Once you have selected a file you should
see the name of the file next to the  button, as well as a
 button (as shown below). You can click
“Browse” again to change the file or “Clear assignment file” to remove the file
altogether.
button (as shown below). You can click
“Browse” again to change the file or “Clear assignment file” to remove the file
altogether.
Complete the remaining configuration as in creating Files assignments, except there are no graders to configure here.
4.3.3 Creating Code reviews
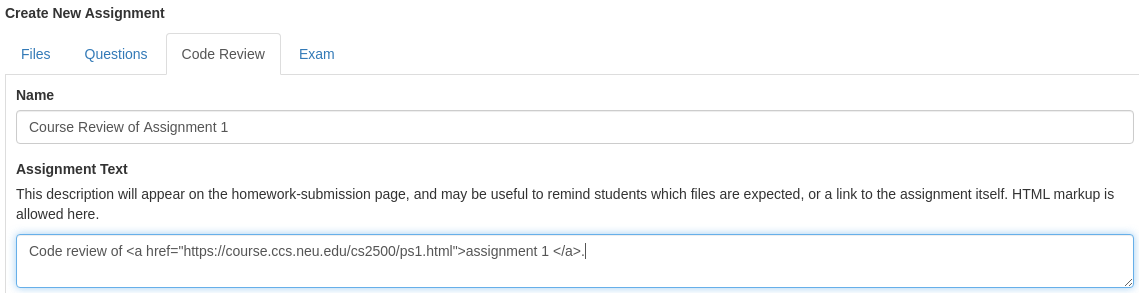
Enter the name of the assignment in the “Name” field. You can also provide a description of the assignment in the “Assignment Text” field but this is not required. Your description can include HTML as shown below.
Click the
 button and select the YAML file that contains the
questions you would like to ask the students. If you are unsure how to format
your YAML file you can use the
button and select the YAML file that contains the
questions you would like to ask the students. If you are unsure how to format
your YAML file you can use the  button to see an
example file. The schema is the same as Questions assignments above. Once
you have selected a file you should see the name of the file next to the
button to see an
example file. The schema is the same as Questions assignments above. Once
you have selected a file you should see the name of the file next to the  button, as well as a
  button (as shown below). You can
click “Browse” again to change the file or “Clear assignment file” to remove
the file altogether.
button (as shown below). You can
click “Browse” again to change the file or “Clear assignment file” to remove
the file altogether.The “Who to review?” field lets you choose whether this is a self review, where students are reflecting on their own earlier submissions, or a peer review, where students are anonymously reviewing the submissions of their classmates.
For peer review assignments, enter the number of submissions the student has to review in the “How many reviews?” field. The default number is 1, meaning that each student will randomly be assigned one other student submission that they need to review. Raising this number asks students to complete multiple reviews —
and therefore each student will receive multiple reviews on their prior homework as well. (This field is obviously not editable for self-reviews, since the students will only be reviewing their own work.) 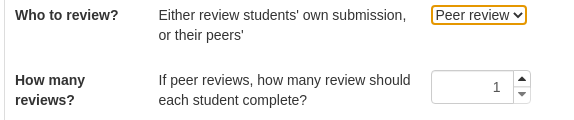
Receiving peer reviews is only useful if the reviews are of decent quality. Morever, gratuitously mean-spirited reviews are demoralizing and unwanted. Accordingly, Bottlenose allows you to censor such unhelpful reviews from the reviewees. In the “Review quality threshold” field, enter a number between 0 and 100. After the code reviews have been graded, reviews with a score less than the given percentage will not be shown to the students. This percentage is 75% by default.

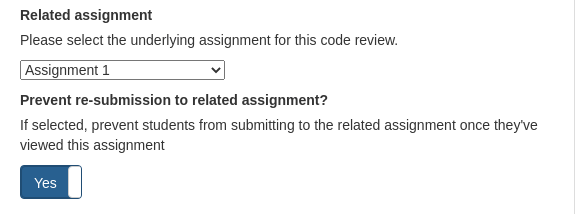
In the “Related assignment field” (on the right) select the assignment that students will be reviewing submissions from. You should see a list of all the Files assignments for the course thusfar in the drop-down menu.
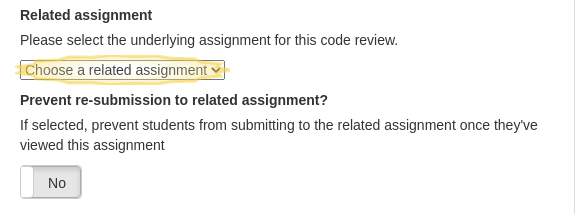
If you want to stop students from submitting to the assignment they are reviewing (since they may now have more information about what you were looking for in that assignment) you can toggle the switch under “Prevent re-submission to related assignment?”.
Complete all the remaining fields as in creating Files assignments above, except there are no graders to configure.
4.3.4 Creating Exams
Enter the name of the assignment in the “Name” field. You can also provide a description of the assignment in the “Assignment Text” field but this is not required. Your description can include HTML as shown below.

Click the
 button and select the YAML file that contains the
questions you would like to ask the students. If you are unsure how to format
your YAML file you can use the
button and select the YAML file that contains the
questions you would like to ask the students. If you are unsure how to format
your YAML file you can use the  button to see an
example file. The schema is simpler than the ones for Questions or Code review assignments. Once
you have selected a file you should see the name of the file next to the
button to see an
example file. The schema is simpler than the ones for Questions or Code review assignments. Once
you have selected a file you should see the name of the file next to the  button, as well as a
  button (as shown below). You can
click “Browse” again to change the file or “Clear assignment file” to remove
the file altogether.
button (as shown below). You can
click “Browse” again to change the file or “Clear assignment file” to remove
the file altogether.
Enter the weight of the exam, and the date the students took the exam. If the exam is entirely extra credit, toggle the extra-credit switch. Finally, save the exam.
4.4 Configuring Graders
There are many different types of graders available for Files assignments. Frequently, you will want to use several graders per assignment. The maximum grade for an assignment will be the sum of all the points for each grader. This has no effect on the weight of the assignment, which is determined separately during the creation of the assignment. In other words, an assignment with three graders, worth 50, 70, and 30 points respectively, will have a maximum grade of 150 points. If that assignment is worth 6% of the student’s course grade, then a submission’s score of 100/150 will earn the student 4/6 of the points in their course grade.
Note that this arithmetic assumes none of the graders are marked as extra
credit. If an assignment has some regular graders and some extra credit
graders, then the maximum score can increase. For example, suppose an
assignment has one 50-point regular grader, and one 50-point extra credit
grader. Further, suppose the assignment is worth 5% of the final grade. A
student with a perfect submission with no extra credit would receive 50/50, or
5% of their final grade. A student with a perfect submission with complete
extra credit would receive 100/50, or 10% of their final grade. Extra credit
graders are marked with a ![]() in their column header in the assignment details page, and are labelled as
"(Extra credit)" when students see their grades for their submissions.
in their column header in the assignment details page, and are labelled as
"(Extra credit)" when students see their grades for their submissions.
It is technically possible to mark an assignment as extra credit, and also to mark some of the graders for that assignment as extra credit. But that scenario is pretty far-fetched, as it implicitly says students could do more than the expected maximum amount of extra credit... The server will alert you if you mark a grader as extra credit when the assignment is also marked as extra credit, but it will not prohibit such a scenario.
Bottlenose supports three loose categories of graders: automated style checkers, automated unit testers, and manual grading.
4.4.1 Style graders
Bottlenose currently supports style graders for Java, for Racket, and for Python. Each of these graders are configured to look for .java, .rkt and .py files respectively, and to ignore any other files. (It makes no sense for a Java style grader to critique a README.txt file, for example.) If no relevant files were submitted, then these graders will give zero points and complain that no files were submitted. (This makes it technically possible for a student to earn full style points by submitting empty files with the appropriate file extensions. We leave it to the professor’s discretion how to grade such situations.)
Style graders are unique among the three categories of graders in that their point scales are absolute. Each style infraction deducts one or two points (depending on severity), and there is no a priori upper bound on the number of stylistic errors a submission could have. Therefore, style grades aren’t normalized by their weights. (I.e., it is impossible to say, "this submission earned 75 out of a maximum 100 possible style points, and the style grader is worth 10, so the student earned 7.5 points in their assignment grade.") Giving a style grader a weight of 20 points, for instance, implies that you require students to make fewer than 10-20 style errors (again, depending on severity) in order to receive any style points at all. Once you’ve set that threshold for style points, you can use that weight to set the scale for any other graders for this assignment.
Enter the number of points the grader is worth in the “Points available” field. The default is 50 points.

If this is an extra credit grader click the button that says
 to toggle the switch to
  .
.Additionally, this grader allows you to override the severities, deductions or messages of existing errors. This file is written in JSON, and has a simple schema:
"maximum deductions per file": <number> – optional, default 50, specifies how many points can be deducted per file before a "mercy rule" kicks in and stops deducting for further violations in that file. (Further mistakes are still reported, though.)
- The remaining fields of the object are the names of individual style rules, and whose associated values are objects with the following fields:
"category": <string> – required, one of "default", "naming", "namingWarning", "formatting", "formattingWarning", "coding", "codingMinor", "codingWarning", "documentation", "testing", "testingMinor", "suggestion", or "ignore". The last category, "ignore", means that any violations of this rule should be ignored completely. The others help provide defaults for related types of errors.
"description": <string> – optional, string value giving a human-readable description of this error. Typically, this is inherited from the description of the category.
"severity": <string> – optional, one of "Error", "Warning", or "Info", corresponding to the type of feedback comment to produce. Typically inherited from the severity of the category, though this may be reasonable to override.
"deduction": <integer> – optional value for how many points to deduct for each infraction of this rule. Typically inherited from the deduction for the category (for example, all "documentation" errors are each worth 2 points), though this is reasonable to override for an individual rule.
"maximumDeductions": <integer> – optional value for how many times this particular error can be deducted before a "mercy rule" kicks in.
You can upload a custom file for this grader to use, to override the default values. Here is an example file that has been used in the past for CS2510:{ "OneTopLevelClass":{"category": "ignore"}, "OuterTypeFilename":{"category": "ignore"}, "SingularField":{"category": "ignore"}, "AvoidStarImport":{"category": "ignore"}, "JavadocMethod":{"category": "ignore"}, "SummaryJavadoc":{"category": "ignore"}, "FormalParametersNeedMeaningfulNames":{"category": "ignore"}, "UncommentedEmptyConstructor":{"category": "ignore"} }
Enter the number of points the grader is worth in the “Points available” field. The default is 50 points.
If this is an extra credit grader click the button that says
 to toggle the switch to
 .
.Enter the maximum allowed line width in the “Maximum line length” field. Students will receive a 1 pt deduction for any line that has more than the given number of characters (up to the number of points available). The default value of 102 matches the default DrRacket line width, though you can change this to suit your preferences.

Enter the number of points the grader is worth in the “Points available” field. The default is 50 points.
If this is an extra credit grader click the button that says
 to toggle the switch to
 .
.Enter the maximum allowed line width in the “Maximum line length” field. Students will receive a 1 pt deduction for any line that has more than the given number of characters (up to the number of points available). The default value of 102 is chosen somewhat arbitrarily, though you can change this to suit your preferences.
Additionally, this grader supports a configuration override file. This file is written in JSON, and has a simple schema:
"maximum deductions per file": <number> – optional, default 50, specifies how many points can be deducted per file before a "mercy rule" kicks in and stops deducting for further violations in that file. (Further mistakes are still reported, though.)
- https://pycodestyle.readthedocs.io/en/latest/intro.html#error-codes describes the style errors that are checked for, and breaks them down into Errors and Warnings, and subdivides each category by prefix ("E1", "W2", etc.). The configuration file allows you to specify either a precise error code ("E112") or merely a prefix ("E2"), and will organize the configurations into a tree based on those prefixes, and select the most specific options accordingly. This allows you to configure e.g. all the errors at once, but override configuration for just one particular error code. Within each grouping, the configuration file accepts four possible fields:
"description": <string> gives the overall category of the error. E.g. "E1" errors have a description of "Formatting (Indentation)".
"deduction": <integer> – optional, default 1, gives the penalty value for each infraction of this rule.
"maximumDeductions": <integer> – optional, default 1000, specifies how many times this particular error can be deducted before a "mercy rule" kicks in.
"severity": <string>, allowed values "Error", "Warning", "Info" or "ignore". The default is either "Error" or "Warning" (based on the error code names), and gives the severity of the comment to be displayed. If a style error is worth reporting, but not worth deducting points, consider making the severity "Warning" or "Info". If you want to specify that this entire rule be ignored, specify "ignore".
You can upload a custom file for this grader to use, to override the default values. Here is a made-up example file to show what the schema looks like in practice (N.B.: the comments are for documentary purposes only; they are not accepted by the style grader and should be removed before using):
{ "maximum deductions per file": 10, "W": { "severity": "ignore" // Ignore all warnings... }, "W2": { "severity": "Error" // But make all whitespace formatting warnings be Errors }, "E302": { "description": "Whee!", "maximumDeductions": 2 }, "E251": { "maximumDeductions": 3, "deduction": 5000 }, "E111" { "severity": "ignore" } }
4.4.2 Automated test graders
Enter the number of points the grader is worth in the “Points available” field. By default, this number is always 50 points.
If this is an extra credit grader click the button that says
 to toggle the switch to
 .
.- Choose the file containing the tests you want to run on the students’ submissions.
For the Checker grader, this should be a .java file which uses the tester library. Please be sure to name the class containing these tests something that will not conflict with the names that students choose for their classes (e.g., InstructorTestsHomework1 would probably not conflict with any student class names).
For the JUnit grader, it may be an archive file (.zip, .tar, .tar.gz or .tgz) containing four directories: starter/src, starter/test, testing/src, and testing/test. All four directories must be present, even if empty. (Place an empty .zipkeep placeholder file in them to ensure the folders get added to the .zip file properly.) The grader will copy the starter files into place, then copy the student files into that directory (and possibly overwrite the starter files), then finally copy the testing files into place (and hopefully not overwrite any student code!). It is critical that your grader class implement a Java security sandbox, to ensure that student code cannot execute with unbounded permissions.
Provide the name of the class containing your test methods in the “Test class” field. For example, the tests in the example below are in the InstructorTestsHomework1 class.
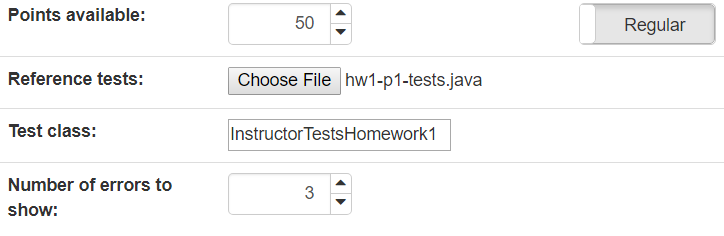
Provide the number of errors you want the students to reveal to students. By default, this number is 3. The server will disply at most this many failed student tests (chosen randomly) to the students. Set this to zero to give students completely black-box testing feedback; set it to a large number to show them all their test failures.
4.4.3 Manual graders
This grader is recommended for most assignments. It allows you (or your staff) to manually give feedback on the assignment. Without this grader there is no way for you to provide customized comments on the files the students submit. The only configurable parameter is the number of points available. This number is 50 by default, but it is generally determined by the number of points in the rubric for the assignment.
4.4.4 Regrading assignments
Go to the assignment you want to edit by clicking on the assignment title, either from the homepage, the main course page or from the Assignments overview page —
whichever is most convenient. In the table of submissions, look for the column of the grader you need to rerun, and look for the circular-arrows icon next in the column header. Click it —
once! This will queue up all the currently used submissions to be regraded (any older submissions will be ignored), and it will take a few minutes to process the backlog.
4.5 Editing assignments
Go to the assignment you want to edit by clicking on the assignment title, either from the homepage, the main course page or from the Assignments overview page —
whichever is most convenient. Click on the
 button in the upper right.
- You will be taken to a page that looks nearly identical to the assignment-creation page, except:
You (naturally) cannot change the type of the assignment
You cannot delete any graders, once any submissions have been made and have been graded. (If you mistakenly included a grader and regret it, you can edit its weight to zero.)
- You cannot completely change the teamset associated with the assignment. Depending on whether the assignment was previously set to be solo or team submission, and whether you are editing the assignment before or after anyone has submitted, your options on how to modify the teamset are limited to some subset of the options below:
Use existing teamset – i.e., share a teamset among multiple assignments; changes to teams will affect all the assignments
No teams – i.e. leave the assignment as solo submissions
New teamset – create a new teamset, which may automatically be pre-populated with 1-person teams for anyone who has submitted already
Copy existing teamset – duplicate the existing teamset and its current teams, so as to separate the teams in this assignment from affecting the teams in another assignment.
When you have finished modifying the assignment, click the
 (or Questions, Code review, or Exam)
button at the bottom to save your changes. You should see a green banner at
the top of the page that says “Assignment was successfully updated”. It will
also tell you how many submissions were affected by this change (whose grades
had been published but were now un-published because they became outdated).
(or Questions, Code review, or Exam)
button at the bottom to save your changes. You should see a green banner at
the top of the page that says “Assignment was successfully updated”. It will
also tell you how many submissions were affected by this change (whose grades
had been published but were now un-published because they became outdated). If you have added a new grader to the assignment, then any existing submissions will be missing a grade for that grader. This will appear as the word "Missing" under the column for the new grader. Click the orange
 button to create the missing graders for
any existing submissions. This is not done automatically for you, since
running an automated grader might take a considerable while.
button to create the missing graders for
any existing submissions. This is not done automatically for you, since
running an automated grader might take a considerable while.

If you have changed the weights of a grader, one of several things may happen. For automated graders (i.e. style-checkers or unit-testers), nothing is done automatically; you can simply rerun the automated grader to recompute scores. (This is not done automatically because it may be computationally expensive, and so you might want to delay running those graders until a less busy time.) For manual graders, all submission’s grades are recomputed as new weight - existing deductions: the grades are not rescaled, but rather the comments’ penalties are deducted from a new maximum grade. If you need to rescale all the deductions, you’ll need to regrade any existing submissions.
4.6 Granting extensions
Go to the assignment you want to edit by clicking on the assignment title, either from the homepage, the main course page or from the Assignments overview page —
whichever is most convenient. Click on the
 button in the upper right.
TODO
4.7 Assigning peer evalulations
When you create a peer-evaluation assignment, you may have several strategies in mind for deciding who should review whom. If you take no action, the server will assign reviewer students to reviewee students dynamically, as reviewers log in to complete their reviews. If you wish to pre-assign particular reviewers to particular reviewees, you can do so:
Go to the assignment you want to edit by clicking on the assignment title, either from the homepage, the main course page or from the Assignments overview page —
whichever is most convenient. Click on the
 button in the upper right.
TODO
5 Managing Registrations
5.1 Accepting registrations
From the course home page click the
 button
at the top.
button
at the top.
If there are any requests they will show up in a “Requests” section at the top of the page as shown below.
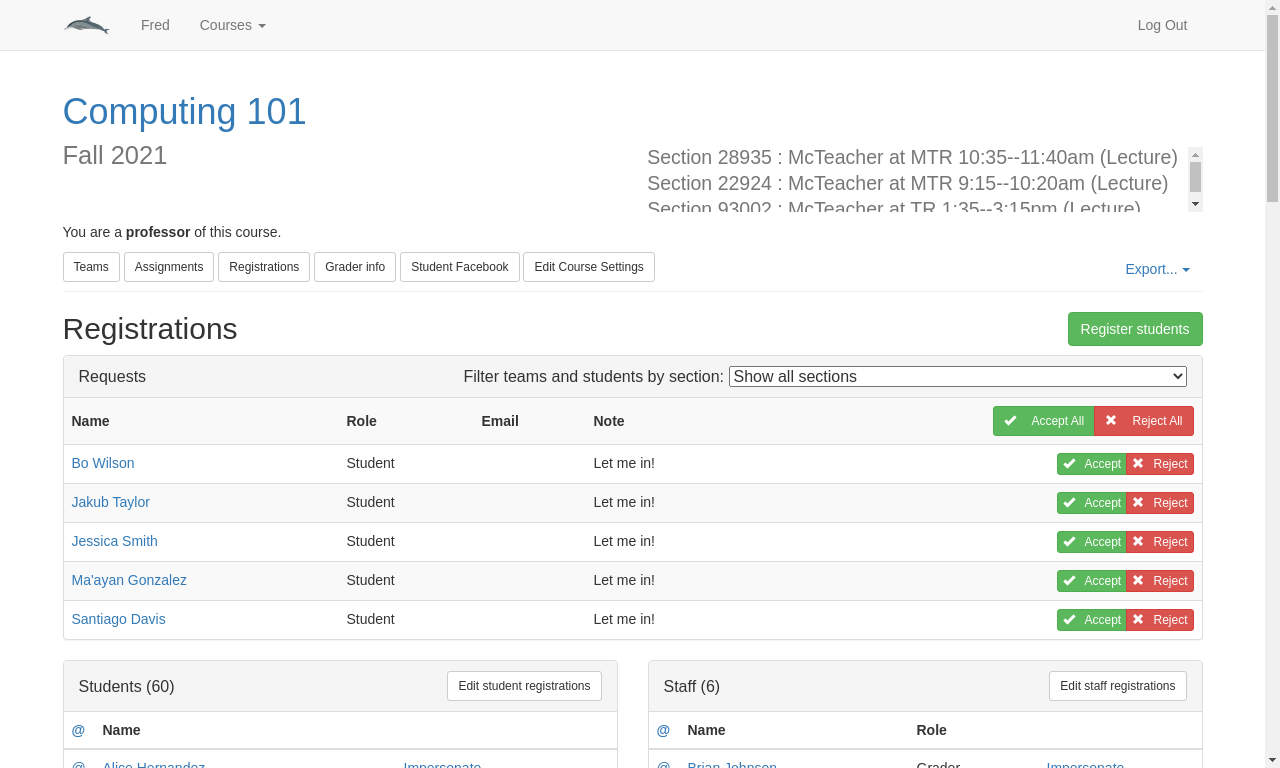
You can either click the
 button to accept all the
registrations, or you can click the
button to accept all the
registrations, or you can click the  buttons individually if you
only want to accept some requests. Likewise you can click the
buttons individually if you
only want to accept some requests. Likewise you can click the
 button to reject all the requests or you can use
individual
button to reject all the requests or you can use
individual  buttons to reject individual requests.
If you select one of the sections from the dropdown, the list of registration requests will filter itself accordingly, and the Accept/Reject All buttons will change into
 /
/ ,
to give you convenient control over individual sections.
,
to give you convenient control over individual sections.
5.2 Editing student registrations
There are several reasons why you might want to edit a student’s registration information: they may have signed up for the wrong lecture or lab section when requesting access to the course; they may have transferred between sections; a staff member may have accidentally enrolled as a student; perhaps a student withdrew from the course accidentally and needed to re-enroll. (This last occurs somewhat often, when students enroll in the wrong section and try to withdraw and re-enroll to fix it: once a student withdraws, Bottlenose does not permit them to re-enroll themselves, and requires the professor to do it.)
From the course home page click the
 button
at the top.
button
at the top.
Click the
 button on the left,
at the top of the list of students in the course.
button on the left,
at the top of the list of students in the course.The resulting page shows a list of all the students in the course and their registrations, broken out by type of section. If your course only has lecture sections, there will be just one list on this page; if your course has labs as well, there will be a second list, etc. To change a student’s lecture section simply select the correct section from the drop-down menu and click the
 button that will appear to the right of the
student. A green ✔ should appear in place of the button, indicating
the change was successfully recorded. If a red ✘ appears instead, try
again in a few minutes, or contact the site administrator for help.
button that will appear to the right of the
student. A green ✔ should appear in place of the button, indicating
the change was successfully recorded. If a red ✘ appears instead, try
again in a few minutes, or contact the site administrator for help.

Editing a student’s lecture section does not affect their lab section. To change that, scroll down to the list of lab registrations and repeat the process above.
To re-enroll a student who has withdrawn from the course, toggle the
 button on the right to change it to
 . Then click the
  button to save your
changes.
button to save your
changes.To correct the role of a staff member of who mistakenly enrolled as a student, choose the dropdown in the second column, and change "Student" to the appropriate role. Then click the
 button to save your
changes.
button to save your
changes.
5.3 Withdrawing students
If a student has officially withdrawn from the course via the registrar, but not withdrawn on the handin server, you may want to record this fact to keep the class roster accurate, for homework grading purposes and for eventual accuracy in the grade spreadsheet.
From the course home page click the
 button
at the top.
button
at the top.
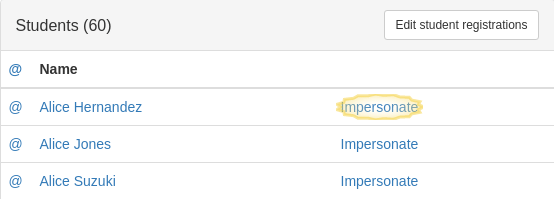
In the list of students on the left, find the name of the student you wish to withdraw and select the Impersonate option next to their name.
This will bring you to a view of the handin server as if you were the student in question. The student’s name appears at the top of the page and a banner saying “You are impersonating <this student>” appears as well.
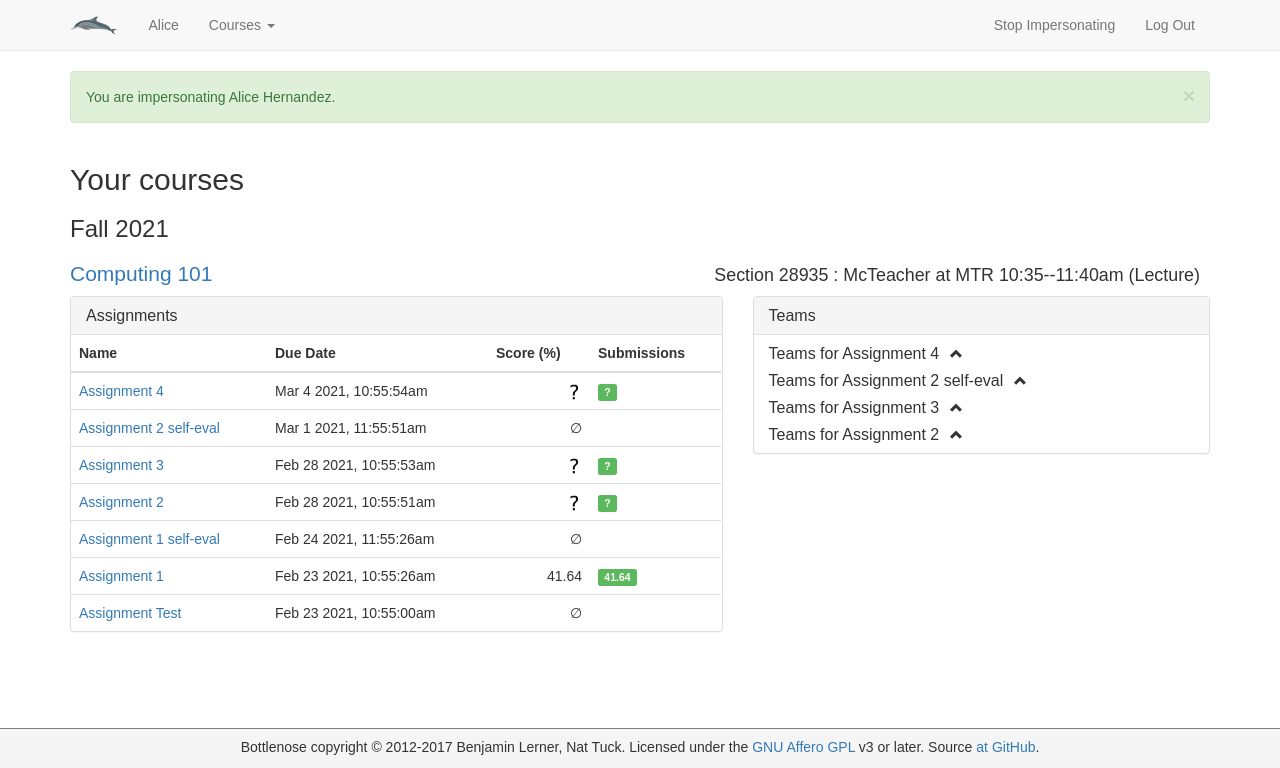
Navigate to the course you would like to withdraw this student from.
Scroll all the way to the bottom of the page and click the red
 button in the bottom right corner.
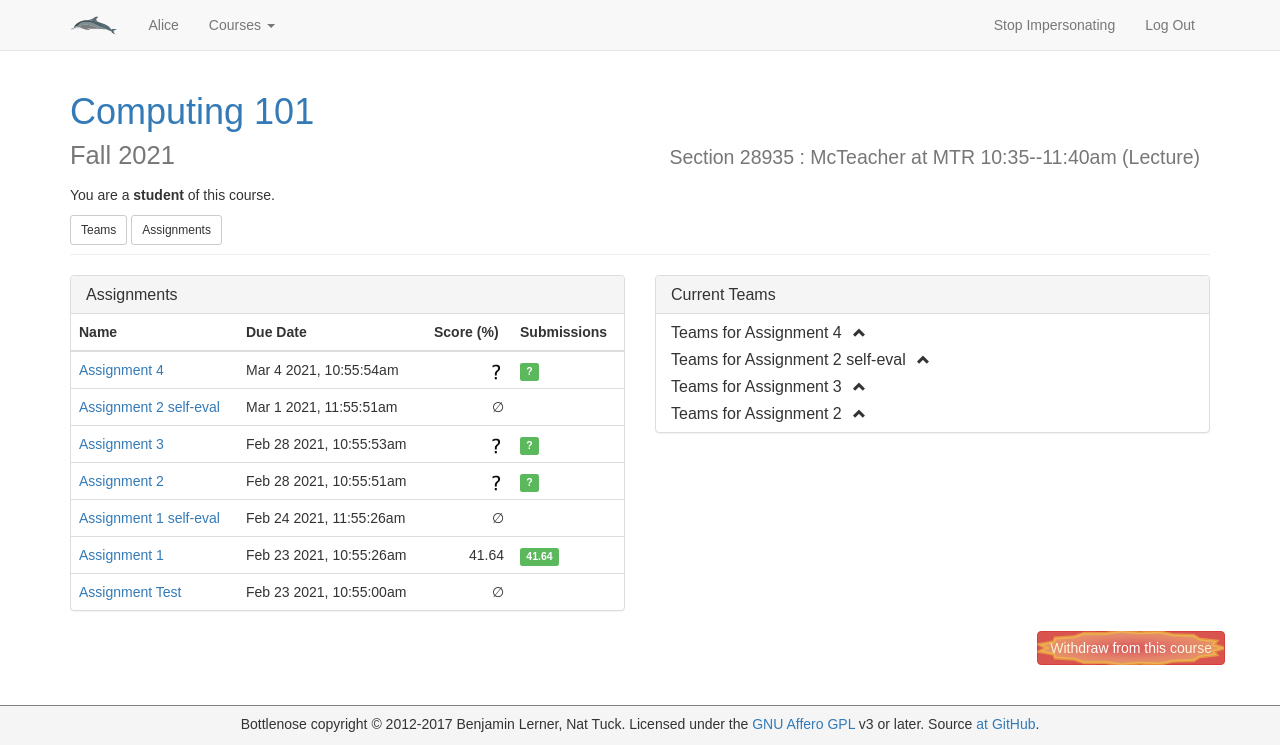
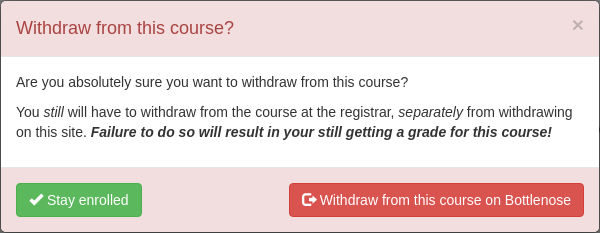
You will get a popup that asks “Are you absolutely sure you want to withdraw from this course?”. This is to deter students from accidentally withdrawing from a course. Click the Withdraw button.
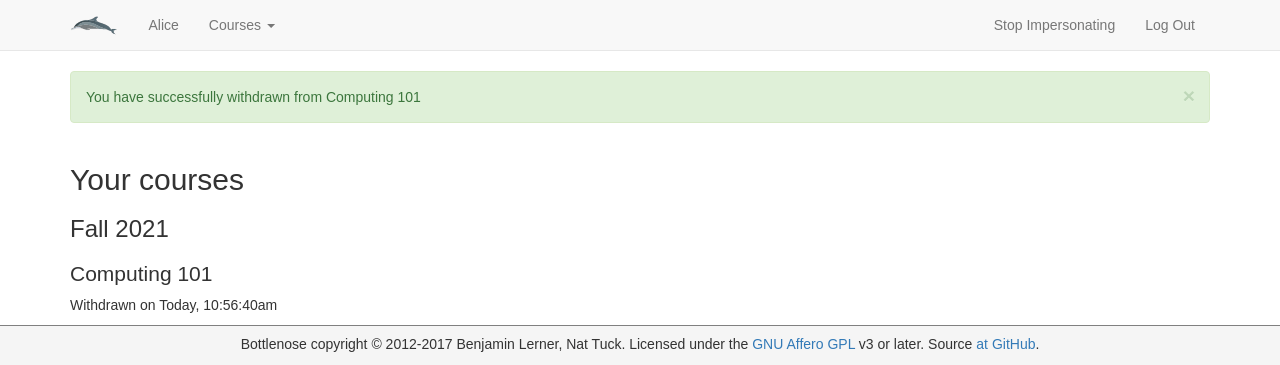
You will be brought back to your homepage with a green banner that indicates that you have successfully withdrawn from the course. You should also see that under the course name there is a date and time at which you withdrew from the course.
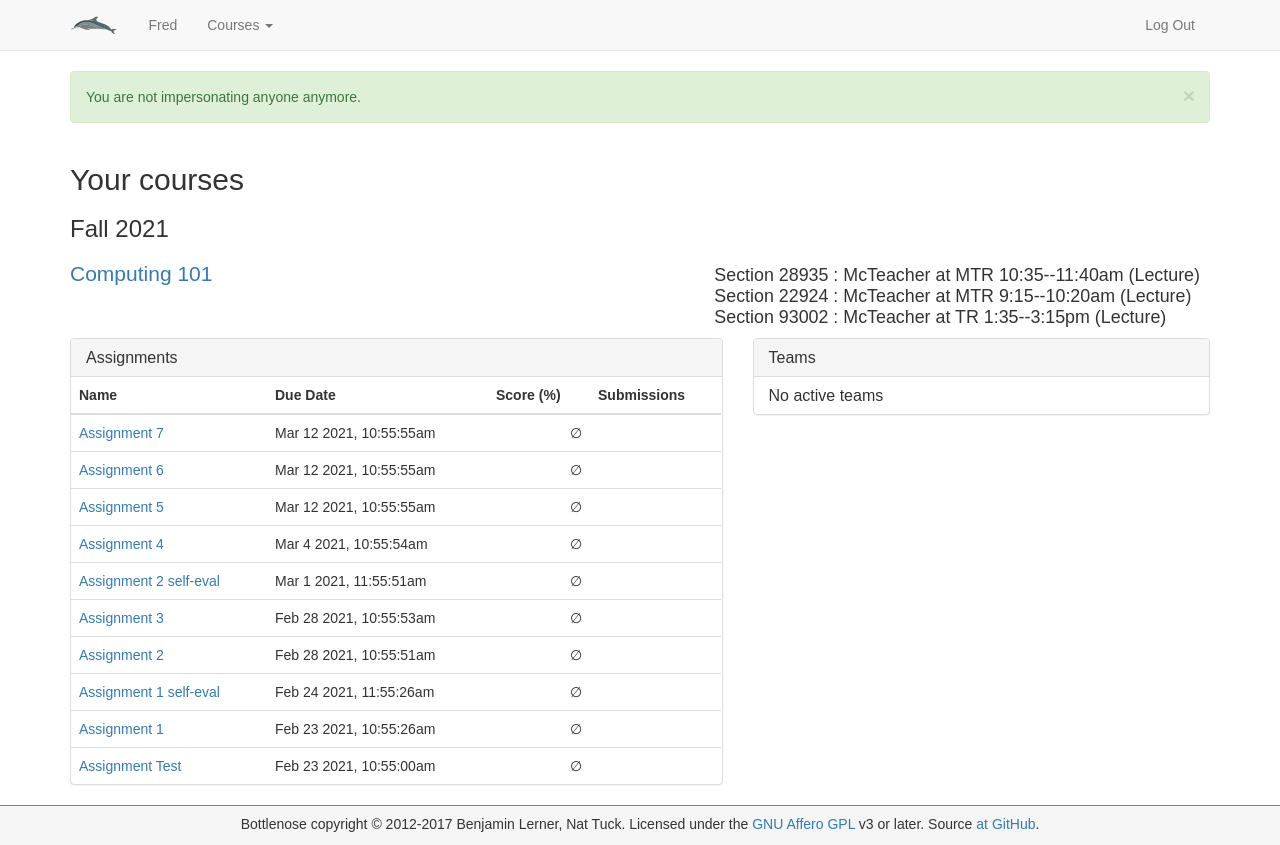
Click the “Stop impersonating” link in the top right of the site banner to return to your (professor) view of the handin server. You should see your homepage and a green banner with a message that you are no longer impersonating anyone.
5.4 Editing staff registrations
There are three types of staff roles on the handin server: graders, assistants, and professors. A grader can access the Teams, Assignments, and Student Facebook pages. An assistant can also access the Registrations page which allows them to approve or edit student registrations. An assistant is also not assigned any grading by default (see “Assigning manual graders” for more information). A professor can create courses and can manage and edit most aspects of their courses. If your staff have signed up for the wrong role you can change this by editing their registration. (If they enrolled as a student, you will need to edit their registration in the student section. If a student mistakenly enrolled as a staff member, you will edit it here.)
From the course home page click the
 button
at the top.
button
at the top.
Click the
 button on the right,
at the top of the list of staff in the course.
button on the right,
at the top of the list of staff in the course.The resulting page is identical to the student registrations page above, and can be edited the same way. To correct the role of a student of who mistakenly enrolled as a staff member, choose the dropdown in the second column, and change the role to "Student". Then click the
 button to save your changes.
6 Managing Grading
One of the most tedious tasks in course management is making sure all homeworks are apportioned to the grading staff to grade in a timely manner. Most homeworks involve some manual component of grading: either commenting on files, grading questions, or grading code reviews. Bottlenose makes it easier to streamline this process, and keep track of who is supposed to be grading whom.
6.1 Creating grader allocations
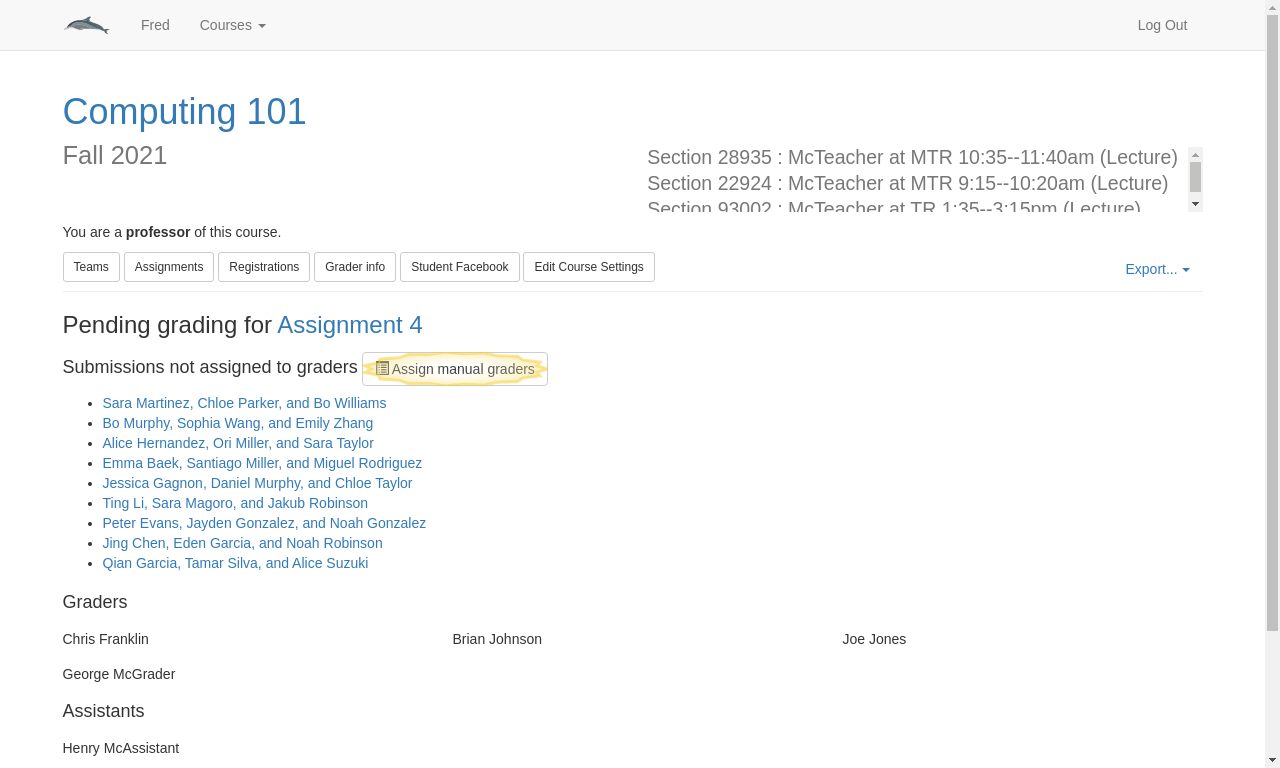
Navigate to the assignment you wish to assign graders for. (This can be from the site homepage, the course homepage, or the assignments overview page, as usual.)
Look for a column with a checklist icon next to it – this will be the manual graders for Files assignments, or the graders for Questions or Code review assignments.
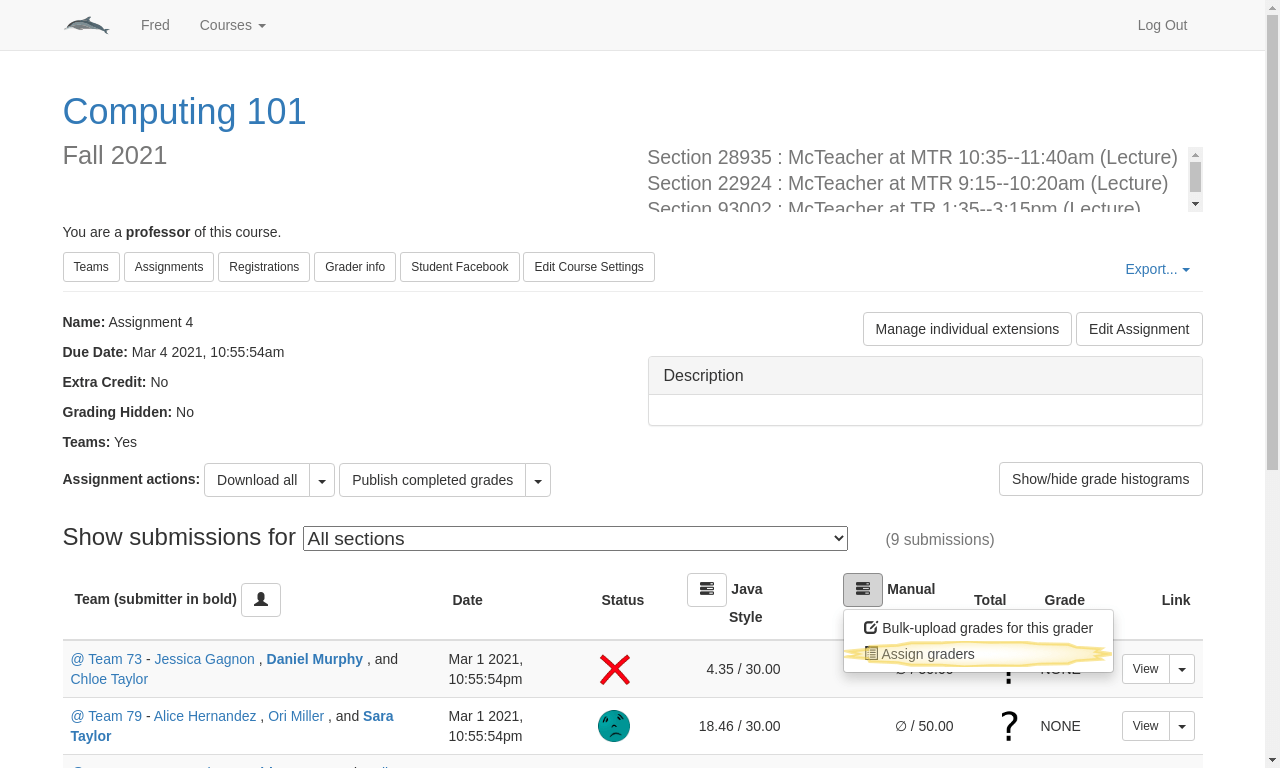
This grader-allocation summary page shows any current grading assignments as well as all submissions which have not yet been assigned to anyone. Click the
 button to edit any needed allocations.
The grader-allocations editing page allows you to modify who grades whom. There are two ways to assign graders, depending on your needs. The first is to manually assign a single submission to a single grader. To do this, scroll to the “Assign single grader” section. Select a submission to grade on the left and a staff member to grade it on the right. Click the
 button in the middle.
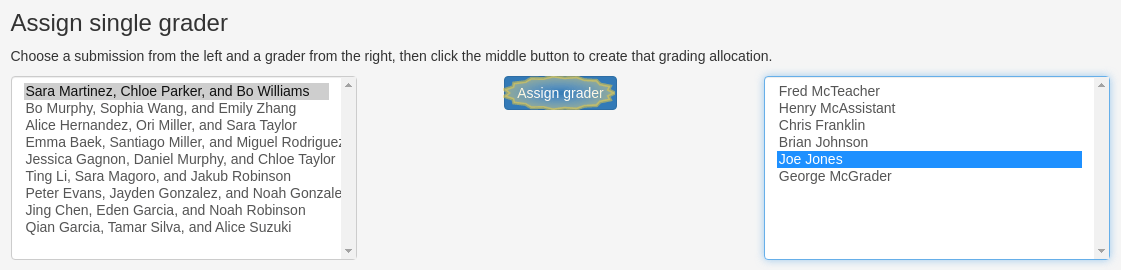
You should now see the submission listed under the staff member you chose.
If you prefer to randomly assign graders to submissions, scroll to the “Bulk grading allocations” section at the top. The text boxes next to each staff member accept a weight, indicating proprotionately how much work each staff member should have to do. In the example below, the professors and assistants will grade no submissions, and Joe will be grading twice as much work as all the other graders. By default all professors and assistants have a weight of zero, and all graders have a weight of one. Click the
 button to assign the graders.
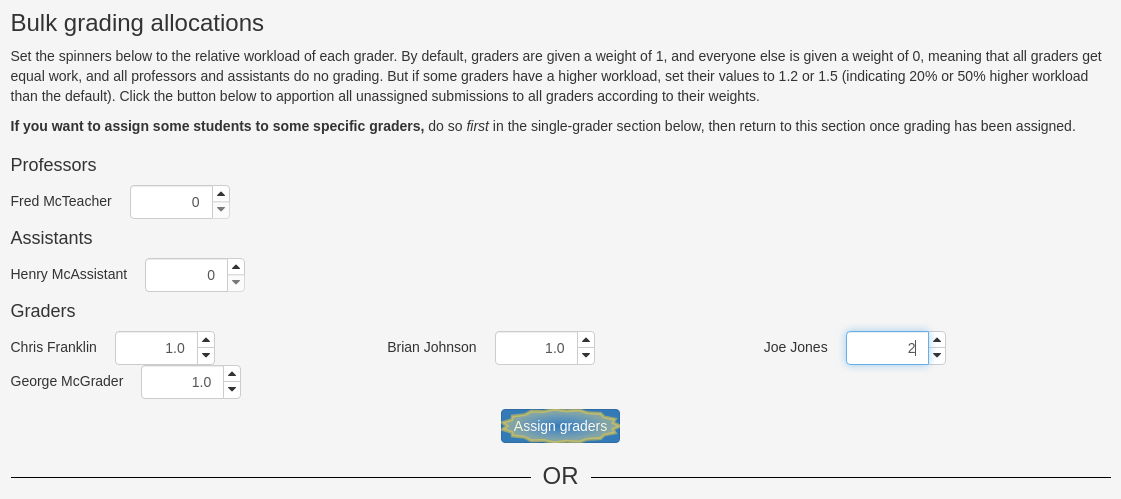
You should now see all submissions listed under a staff member who had a non-zero weight.

6.2 Removing grader allocations
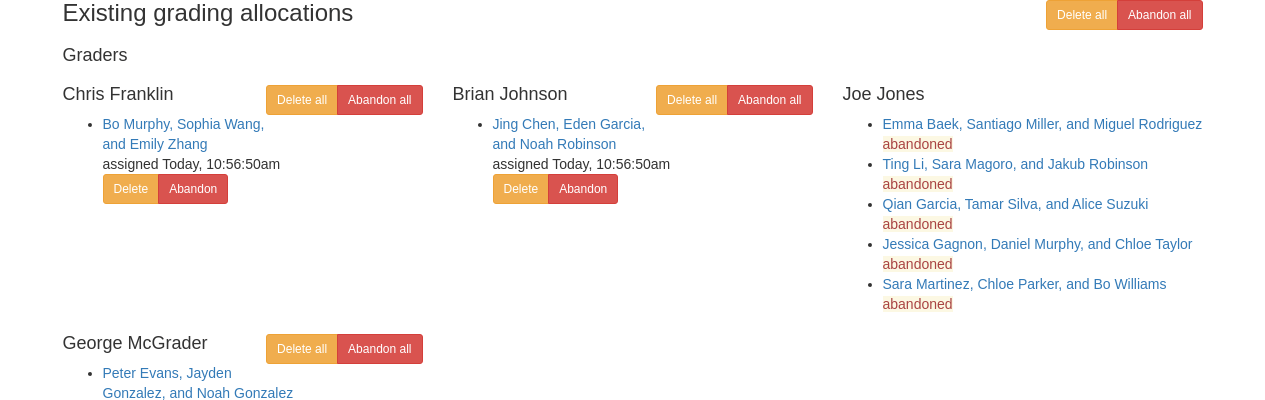
Sometimes, graders cannot or simply do not finish their assigned work. Sometimes this is excusable, and sometimes it is not. Because Bottlenose tracks how long each grader spent on their work, it is helpful to remove grader allocations when a grader isn’t getting their work done, and there are two ways to do this. If a grader has a valid reason they cannot complete the work (emergency, conflict of interest, etc), then you should delete the grader allocation. If there is no valid excuse, then you should abandon the grader allocation. Abandoned allocations remain in the system, so you can keep track of which graders are unreliable.
Repeat the first three steps above to get to the grader-allocation editing page for the assignment you wish to modify.
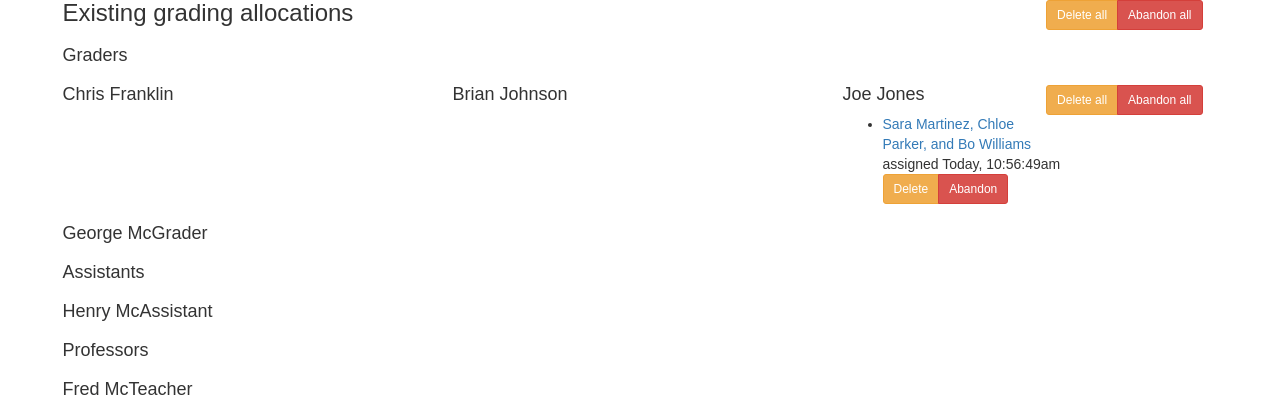
You will be brought to the grader allocations page. Scroll to the bottom where current allocations are listed. The first two buttons allow you to
 allocations or
  allocations,
regardless of who is assigned to whom.
allocations,
regardless of who is assigned to whom.Next to each grader are another pair of
 and
and
 buttons, which will let you remove all the allocations
for that particular grader.
buttons, which will let you remove all the allocations
for that particular grader.Finally, next to each individual allocation are a pair of
 and
and  buttons, that let you remove an
individual allocation.
buttons, that let you remove an
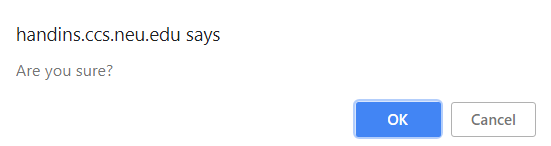
individual allocation.After clicking any of these buttons, Bottlenose will ask you to confirm:
If you abandoned an allocation it will still show up under the person’s name, with a note that the submission was abandoned.
6.3 Reviewing grader feedback
You may want to review the feedback your staff is leaving on the assignments. To do this, navigate to the assignment you wish to view.
To review the feedback on a particular submission click the
 button next to that submission.
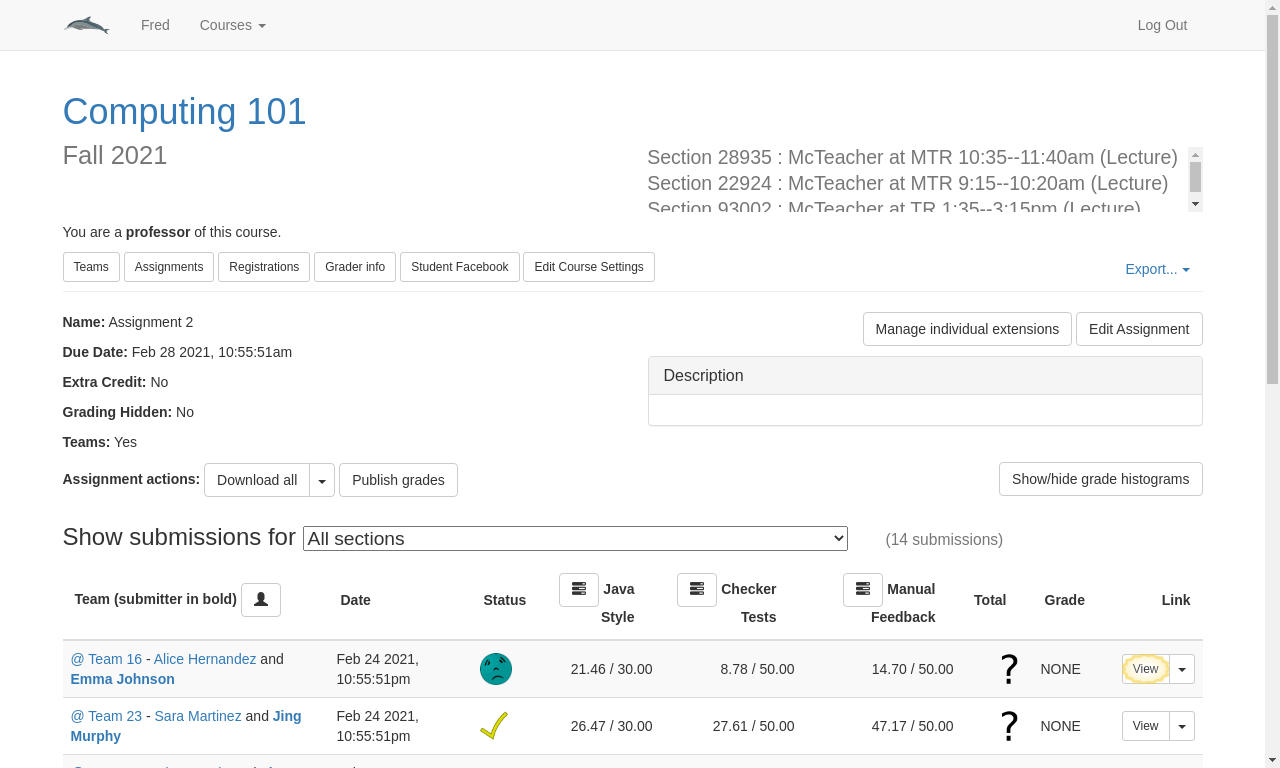
Click the “Grader output” link in the appropriate row: for Files assignments, this will be named “Manual Feedback”; for Code review assignments it will be named “Codereview Grading”; for Questions assignments it will be named “Question Grading”.

From here you can see whatever feedback was left on the assignment. If you object to the grading, you can go back to the submission page and click the
 button, then edit the feedback as needed.
6.4 Selecting alternate submissions
TODO
6.5 Entering exam grades
TODO
6.6 Publishing grades
TODO
6.7 Grader statistics
To view the grader statistics, click the  button at
the top (this button should be available from anywhere in the course).
button at
the top (this button should be available from anywhere in the course).
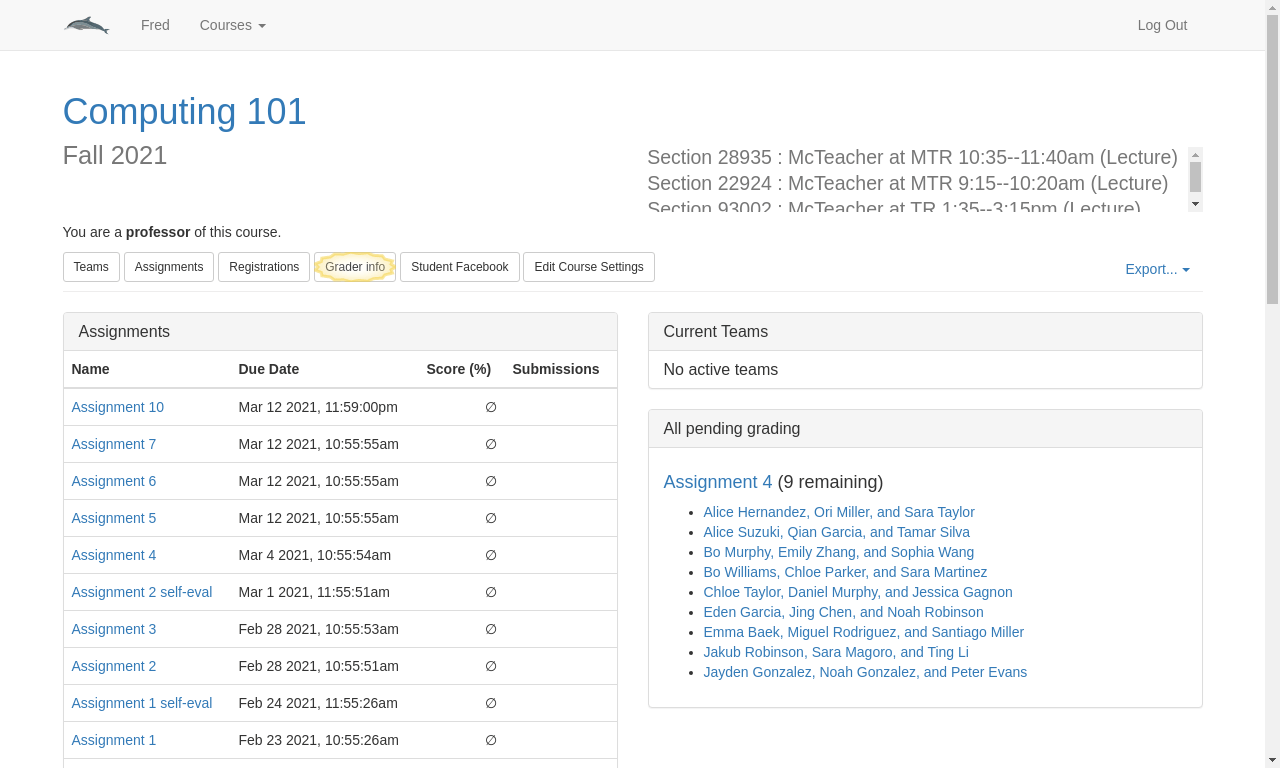
Incomplete gradings: This is the number of assignments that were allocated to this grader which have not yet been completed. This is useful if you want to know how many submissions are still being graded by whom.
Abandoned gradings: This is the number of assignments which were allocated to this grader which were then abandoned. Allocations are most often abandoned when a grader does not complete their grading on time, so the lower this number is, the better.
Average grading time: This is the average time between when a grader is allocated submissions and when their grading is complete.
7 Managing Teams
7.1 Downloading teams
Click the “Export” link in the top right (this should be available on any page
for the course) and select the “Teamsets as Excel” option. This will allow you
to download a spreadsheet of all the teams for all the assignments in the
course. When you open this file, you will need to enable editing in order to
view all the data.
7.2 Investigating partners
TODO